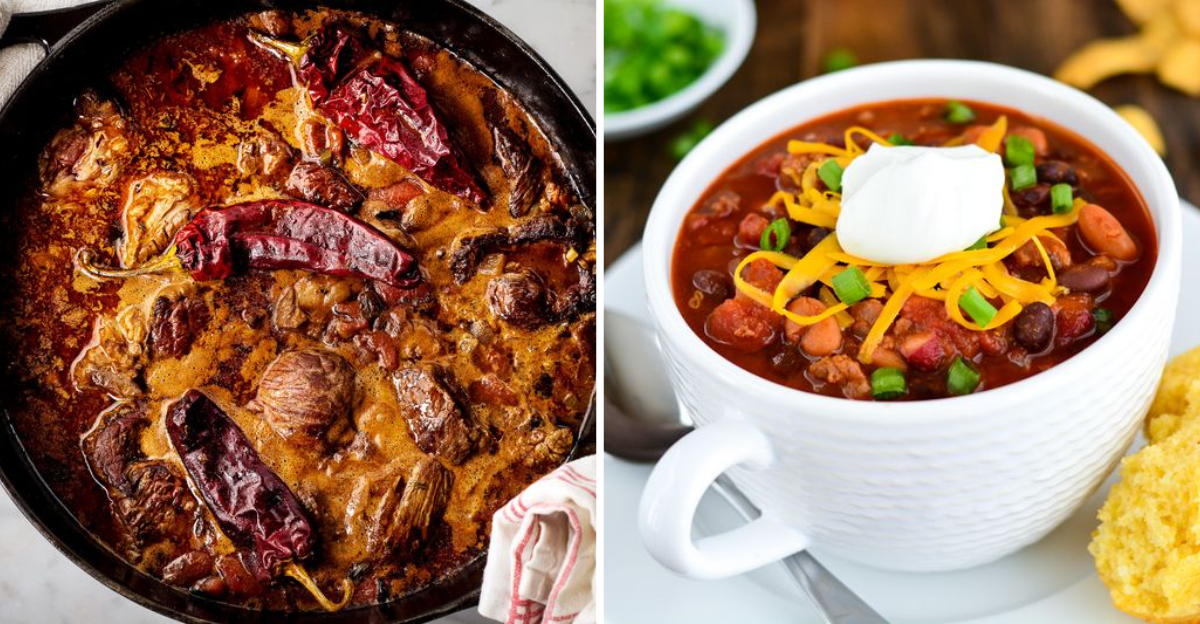
Texas’ Slow Cooker Chili Is The Southern Comfort Classic You Will Make Again And Again

There’s something magical about coming home to the rich, spicy aroma of chili simmering away in your slow cooker. Texas-style chili brings bold flavors and hearty satisfaction to any table, making it a beloved comfort food across the South.
This classic dish combines simple ingredients with patient cooking to create a meal that keeps everyone coming back for more.
1. What Makes Texas Chili Different
Authentic Texas chili stands apart because it skips the beans entirely. The focus lands squarely on tender chunks of beef swimming in a thick, spice-rich sauce.
Traditional recipes rely on dried chiles and cumin rather than store-bought chili powder. This approach creates deeper, more complex flavors that set Texas chili apart from other regional variations across the country.
2. Ingredients You’ll Need
Gather beef chuck, dried ancho and guajillo chiles, fresh garlic, onions, cumin, oregano, beef broth, and tomato paste. Quality ingredients make all the difference in the final taste.
Some cooks add a touch of masa harina for thickness or a splash of coffee for depth. Keep it simple at first, then experiment with your own signature touches once the basics feel comfortable.
3. Choosing The Right Cut Of Meat
Beef chuck offers the perfect balance of flavor and tenderness for slow-cooked chili. Its marbling breaks down during the long simmer, creating melt-in-your-mouth texture.
Cut the meat into one-inch cubes for the best results. Avoid lean cuts like sirloin, which tend to dry out over extended cooking times and lack the rich flavor chuck provides naturally.
4. Prep Work: Building The Flavor Base
Browning the beef creates a caramelized crust that adds incredible depth to the finished chili. Take time with this step – don’t rush it.
Sauté onions and garlic until fragrant and softened before adding them to the slow cooker. These aromatic vegetables form the foundation of flavor that supports all the spices and meat beautifully throughout the cooking process.
5. Toasting And Layering The Spices
Toasting cumin seeds in a dry skillet awakens their essential oils and intensifies their earthy aroma. This extra step takes only minutes but transforms the entire dish.
Rehydrate dried chiles in hot water, then blend them into a smooth paste. Layer spices gradually rather than dumping everything at once for a more balanced, nuanced flavor profile.
6. Slow Cooker Assembly
Layer the browned beef at the bottom, followed by the sautéed vegetables and spice mixture. Pour in beef broth until everything sits just covered.
Stir gently to combine, then secure the lid tightly. Set the slow cooker to low for eight hours or high for four, depending on schedule and patience levels for the day ahead.
7. Simmering To Perfection
Low and slow wins the race when making Texas chili. The extended cooking time allows tough connective tissue to break down completely.
Resist the urge to lift the lid frequently – each peek releases heat and extends cooking time. After several hours, the beef should fall apart easily, and the sauce should coat the back of a spoon nicely.
8. Finishing Touches
Taste the chili about thirty minutes before serving and adjust seasoning as needed. Add salt gradually – it’s easier to add more than to fix an over-salted pot.
Stir in masa harina mixed with water if the sauce seems too thin. Some cooks finish with a squeeze of lime juice or dash of vinegar to brighten the rich, meaty flavors.
9. Serving Suggestions
Serve the chili in deep bowls with classic toppings like shredded cheese, sour cream, and diced onions. Cornbread or warm tortillas make excellent sides.
Some folks enjoy their chili over rice or baked potatoes for a heartier meal. Offer hot sauce on the side for those who crave extra heat without overwhelming the whole batch unnecessarily.
10. Storage And Reheating Tips
Chili tastes even better the next day after flavors have had time to meld together overnight. Store leftovers in airtight containers in the refrigerator for up to four days.
Freeze portions in freezer-safe containers for up to three months. Reheat gently on the stovetop or in the microwave, adding a splash of broth if the consistency seems too thick after storage.
11. Variations To Try
Experiment with different chile combinations like chipotles for smokiness or New Mexico chiles for sweetness. Each variety brings its own personality to the pot.
Try substituting pork shoulder for beef, or mix in some chorizo for extra spice. While purists might object, adding beans creates a heartier version that stretches the meal further for larger gatherings.
12. Pro Tips For The Perfect Bowl
Make chili a day ahead when possible – the flavors develop beautifully overnight in the refrigerator. Skim any solidified fat from the surface before reheating.
Keep a chili journal noting what worked and what didn’t each time. Small adjustments to spice ratios or cooking times help develop a signature recipe that becomes a household favorite over time.


