19 Layering Techniques That Make Any Room Feel Professionally Styled
Ever wondered why some rooms just feel right when you walk in? The secret often lies in layering – the art of combining different elements to create depth, texture, and visual interest.
Professional designers use specific layering techniques to transform ordinary spaces into extraordinary ones.
With these simple methods, you can elevate your home’s style without hiring a decorator.
1. Mix Textures Like Velvet, Linen, and Wool
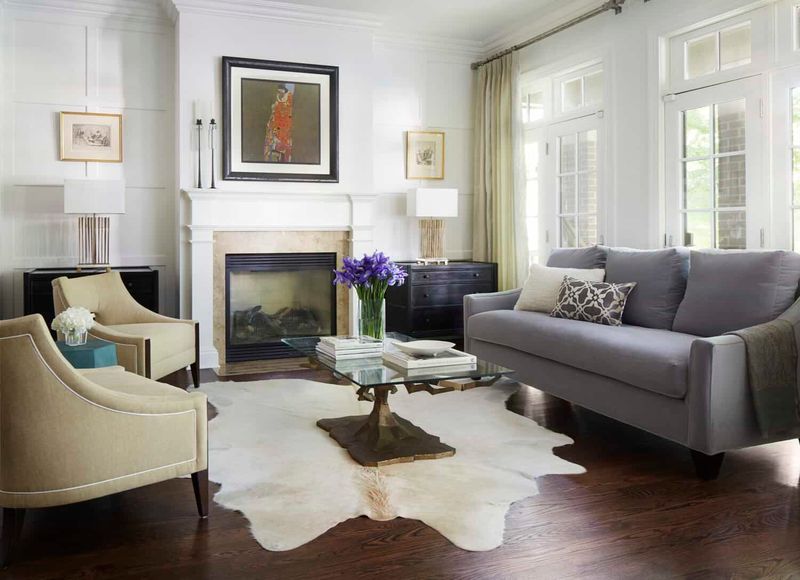
Rooms with only one texture feel flat and uninspired. When I combine plush velvet pillows with crisp linen curtains and cozy wool throws, the space instantly gains dimension and character. This contrast creates visual and tactile interest.
Try incorporating at least three different textures in each room. Maybe a smooth leather sofa, rough jute rug, and silky curtains. The key is balance too many competing textures can feel chaotic. For small spaces, stick to subtle texture variations.
In larger rooms, you can be more dramatic with your choices. This simple technique makes even budget-friendly spaces feel luxurious and thoughtfully designed.
2. Layer Rugs for Depth and Interest
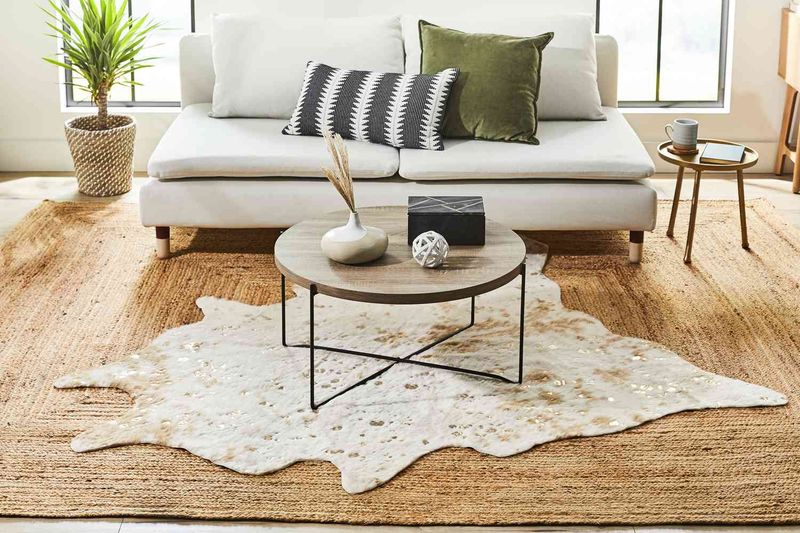
Placing one rug over another creates instant designer appeal. I love starting with a large natural fiber rug like jute or sisal as the base, then adding a smaller, more colorful or patterned rug on top.
This technique defines seating areas while adding warmth and personality. The top rug should be about two-thirds the size of your furniture arrangement. For a cohesive look, ensure the base rug extends at least 18 inches beyond the top rug on all sides.
This prevents the layered effect from looking accidental. When mixing patterns, keep one simple and one more detailed. This prevents visual competition while still creating that coveted designer depth that makes rooms feel finished.
3. Combine Throw Pillows in Different Sizes
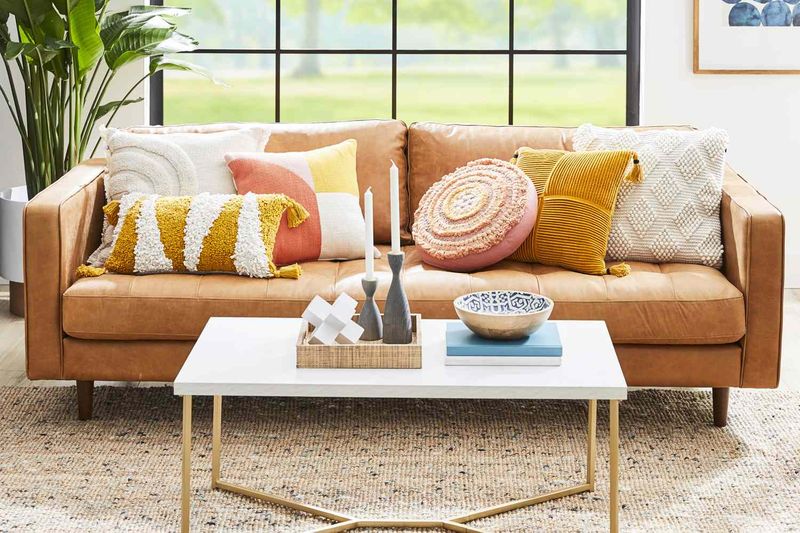
Matching pillow sets scream “straight from the store display.” Instead, I arrange pillows in varying sizes, shapes, and patterns for that designer-curated feel. The magic formula?
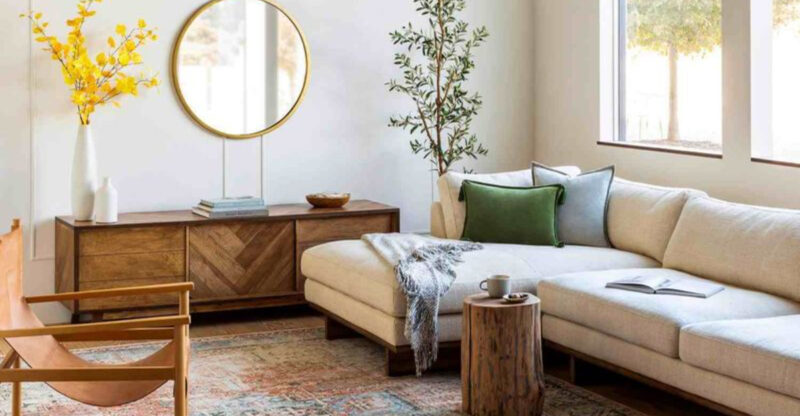
Start with larger pillows (24-inch) at the outer corners, then layer medium ones (20-inch), finishing with smaller accent pillows (16-inch) at the center. If mixing patterns feels intimidating, stick with a cohesive color palette. Perhaps use solid colors for larger pillows and introduce patterns in smaller accent pieces. This creates harmony while maintaining visual interest.
Don’t forget about pillow inserts! Down or down-alternative inserts that are slightly larger than your pillow covers create that plush, professional look. Good pillows transform a basic couch into a magazine-worthy seating area.
4. Stack Books on Coffee Tables or Shelves
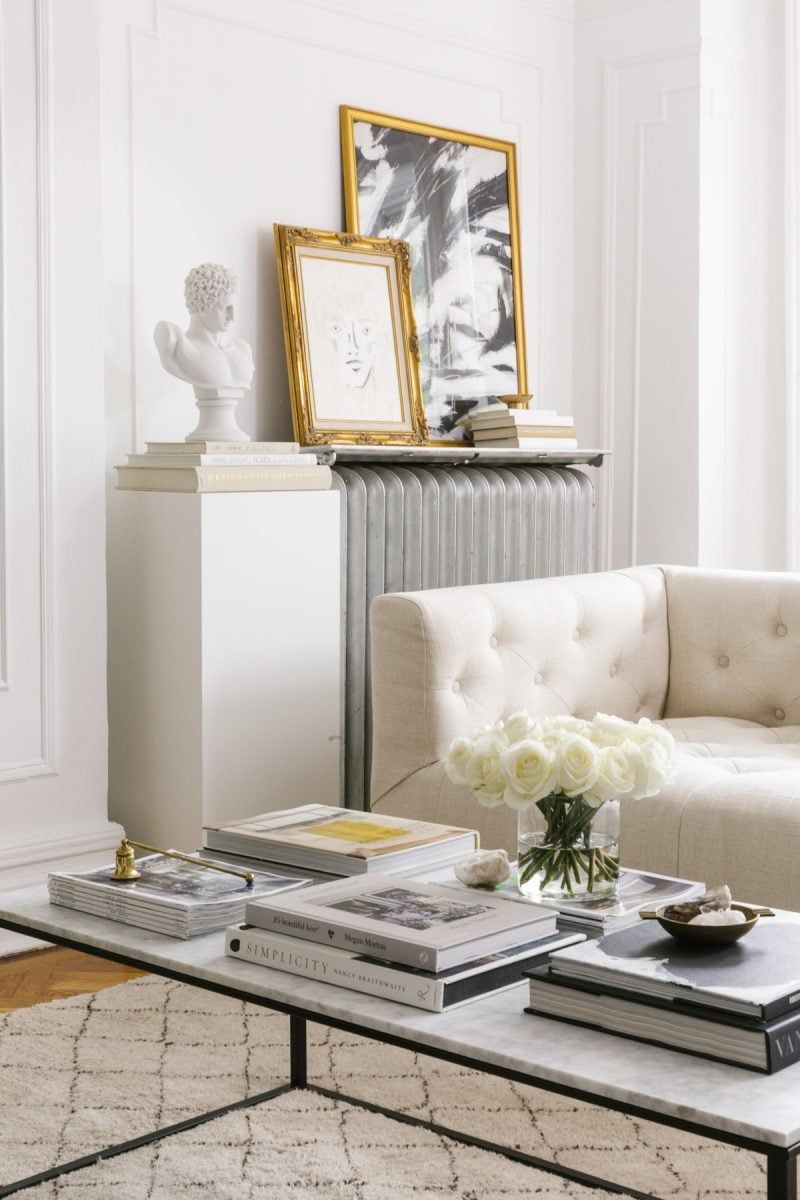
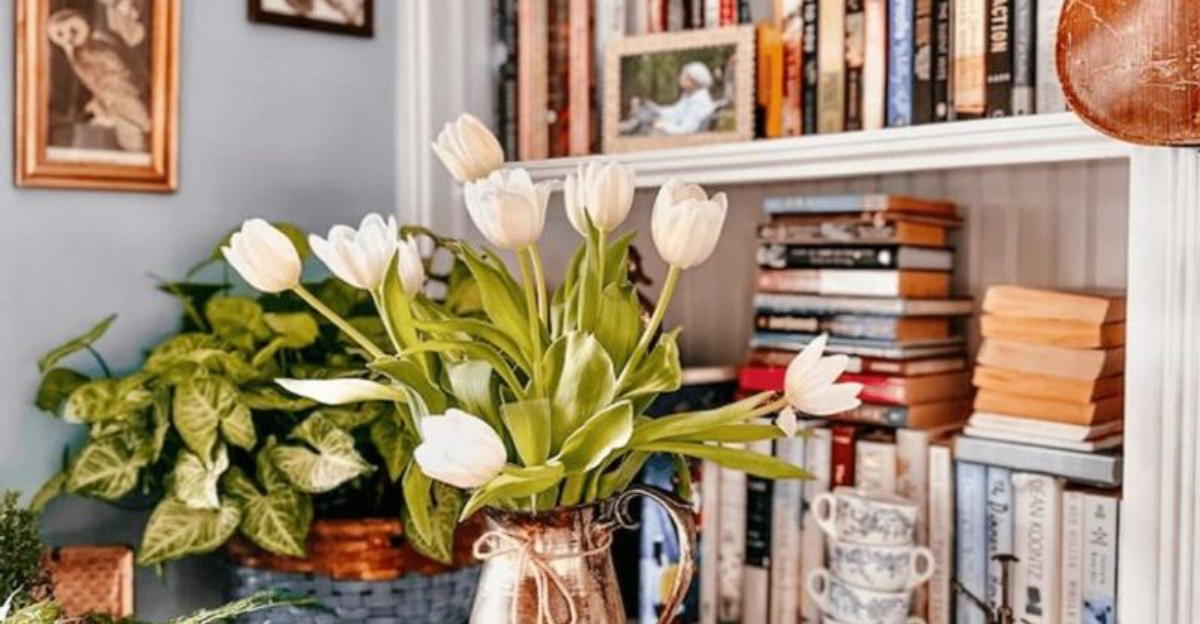
Books aren’t just for reading – they’re powerful styling tools! When I stack books horizontally in varying heights, they create platforms for displaying smaller decorative objects while adding color and personality.
This technique works beautifully on coffee tables, side tables, and bookshelves. For coffee tables, try creating two or three stacks of different heights. Top each stack with something interesting: a small plant, a decorative box, or a unique figurine.
The key is balancing the heights of your arrangements to create visual rhythm. Choose books with spines that complement your color scheme for a cohesive look. Or remove dust jackets to reveal more neutral bindings underneath. This simple technique adds instant sophistication and tells visitors something about your interests.
5. Drape Throw Blankets Over Sofas or Chairs
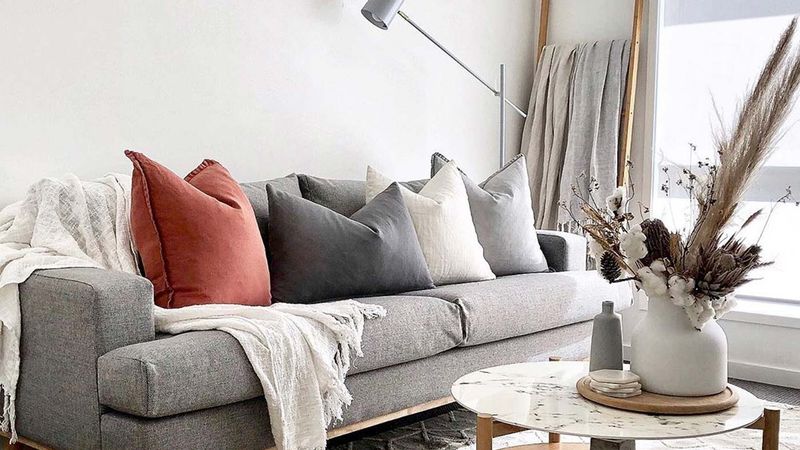
That perfectly casual-yet-intentional throw blanket isn’t just tossed there it’s strategically draped! I fold throws into thirds lengthwise, then drape them over the arm or corner of furniture for that effortless designer look. This simple addition brings color, texture, and warmth to any seating area.
During warmer months, lightweight cotton or linen throws work beautifully. Switch to chunky knits or faux fur in winter for seasonal coziness. The contrast between the furniture fabric and throw texture creates visual interest even in monochromatic spaces.
For a more relaxed vibe, try the waterfall drape fold the throw in half, hang it over the furniture back with the fold at the top, then let it cascade down. This technique instantly transforms plain furniture into inviting, lived-in pieces.
6. Use Wall Art in Varying Sizes
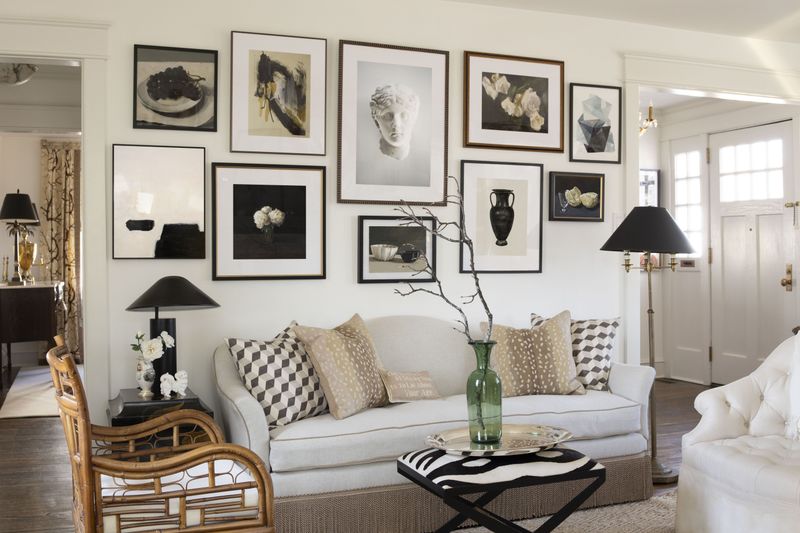
Hanging identically sized artwork in a row might seem safe, but mixing different dimensions creates dynamic, gallery-worthy walls. When I combine large statement pieces with smaller complementary works, the arrangement feels collected over time rather than purchased as a set.
Start with your largest piece as an anchor, then build around it with smaller works. Maintain consistent spacing (2-3 inches) between frames for a cohesive look. Though the sizes vary, keeping one element consistent like frame color or art style helps unify the collection.
Don’t limit yourself to just paintings or prints. Incorporating dimensional objects like sculptural pieces, woven wall hangings, or even decorative plates adds unexpected texture. This layered approach to wall decor creates depth that flat, uniform arrangements simply can’t achieve.
7. Mix Materials Like Wood, Metal, and Glass
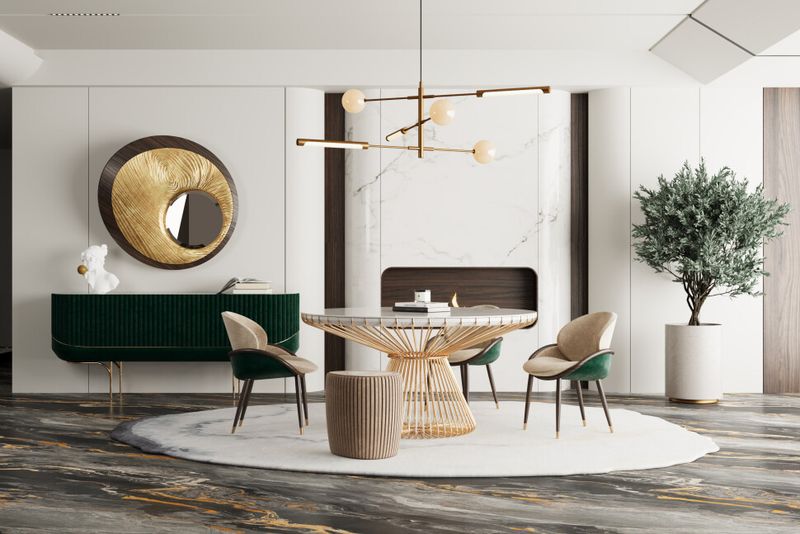
Rooms with only one material feel flat and predictable. I balance warm and cool elements by mixing wooden furniture with metal accents and glass pieces. This creates visual tension that makes spaces feel intentionally designed rather than randomly assembled.
The secret is finding the right ratio too much metal can feel cold and industrial, while too much wood might seem rustic or heavy. Aim for a dominant material (often wood for furniture) with secondary materials as accents. Glass elements like coffee tables or lamps help lighten visual weight.
Even within one material category, mixing is key. Combine different wood tones rather than matching everything perfectly. This collected-over-time approach creates depth that perfectly matched furniture sets lack. Remember, contrast creates interest!
8. Combine Patterns in Similar Color Palettes
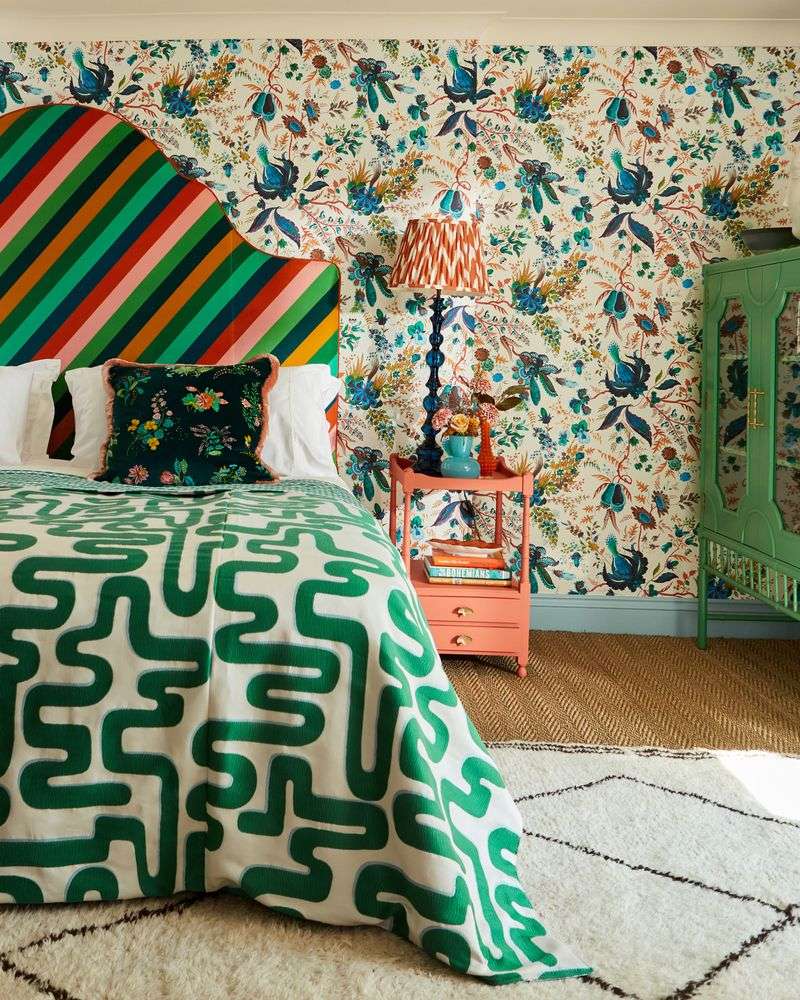
Pattern mixing terrifies many homeowners, but it’s actually quite simple with the right approach. My foolproof method? Select patterns that share at least one color. This creates a visual thread that ties diverse designs together seamlessly.
Start with three different pattern scales: large (like a bold floral or geometric), medium (perhaps a stripe or smaller geometric), and small (tiny dots or subtle texture). The varying scales prevent patterns from competing for attention. For beginners, limit yourself to 3-4 patterns per room.
Solid colors between patterned elements give the eye resting places. Try a patterned chair with solid pillows, or patterned curtains against a solid wall. This balanced approach creates rich, layered spaces that feel cohesive rather than chaotic exactly what professional designers achieve.
9. Add Plants at Different Heights
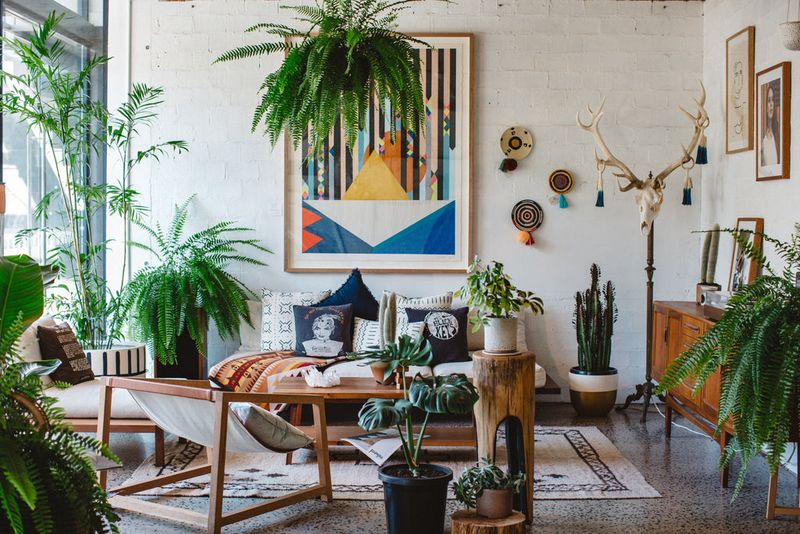
Greenery instantly elevates any space, but the magic happens when plants occupy different vertical planes. I place tall floor plants like fiddle leaf figs in corners, medium plants on side tables, and small succulents on shelves or coffee tables. This creates a natural, layered effect that draws the eye around the room.
Varying plant types adds interest beyond just height differences. Mix structural plants (like snake plants) with trailing varieties (pothos or ivy) and softer, bushier options (ferns). The contrasting shapes create visual rhythm even when the plants share similar colors.
Don’t have a green thumb? Quality faux plants work beautifully in this technique too. The key is proper placement create that multi-level effect regardless of whether your greenery is real or artificial. This simple strategy breathes life into any room.
10. Layer Window Treatments (Sheers + Drapes)
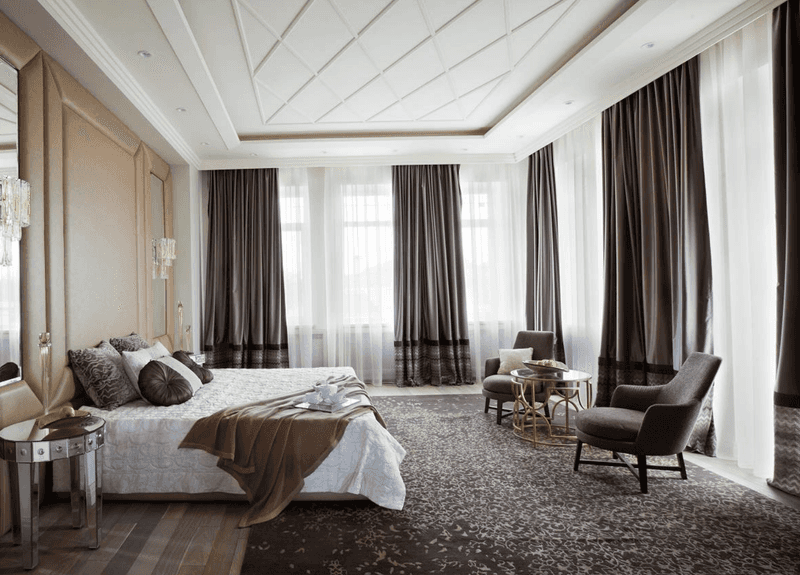
Hotel-worthy windows never have just one layer of treatment. I create that luxurious, finished look by combining sheer curtains closest to the window with heavier drapes on the outside. This dual-layer approach offers both light control and privacy while adding significant textural interest.
Hang both layers from the same rod using double brackets, or install two separate rods. For maximum impact, mount hardware close to the ceiling rather than just above the window frame. This creates the illusion of taller ceilings and larger windows.
For color strategy, keep sheers neutral (white or cream) while making a statement with your outer drapes. Or for subtle sophistication, layer tone-on-tone treatments in slightly different shades of the same color. This technique transforms basic windows into architectural features that frame your views beautifully.
11. Group Decor Items in Odd Numbers
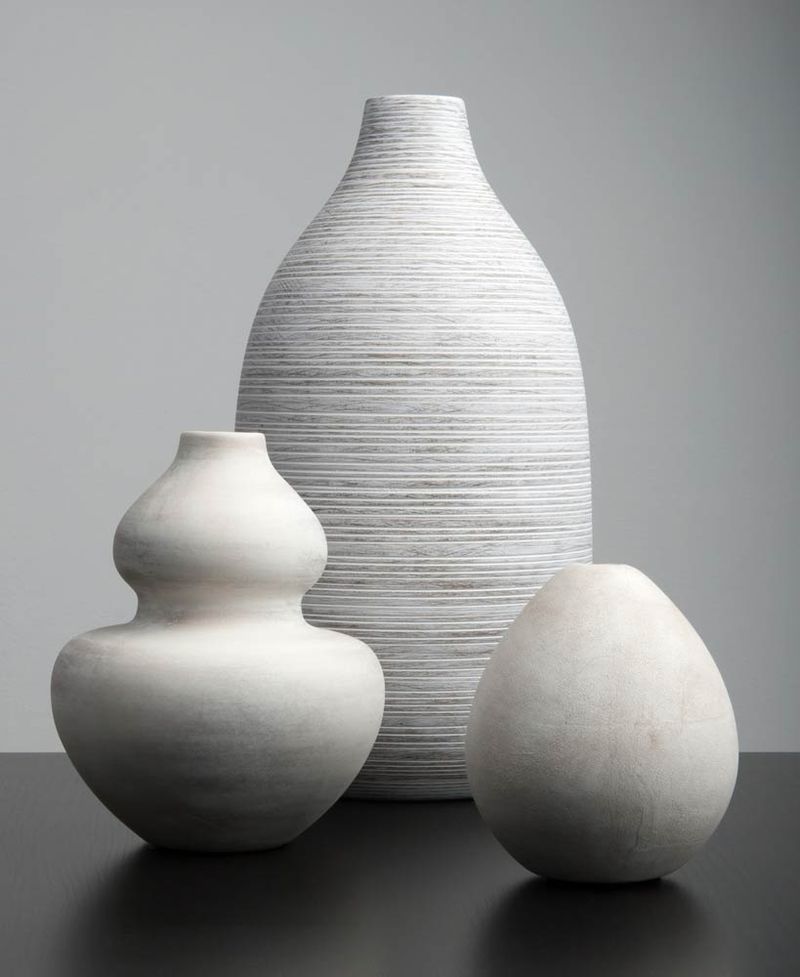
Professional stylists swear by the “rule of three” objects grouped in odd numbers (especially threes and fives) are more visually appealing than even-numbered groupings. When I arrange decorative items in threes, the asymmetry creates natural visual interest and prevents that “matched set” feeling.
Vary the heights within each grouping perhaps a tall candlestick, medium vase, and shorter decorative box together. This creates a pleasing triangular arrangement that guides the eye. For added dimension, vary the objects’ depths too, placing some items slightly forward or back.
Though different, items in a grouping should share something in common perhaps material, color, or theme. This creates unity within diversity. This simple numerical trick makes shelves, console tables, and mantels look instantly more sophisticated and intentionally designed.
12. Use Mirrors Behind Decor for Reflection
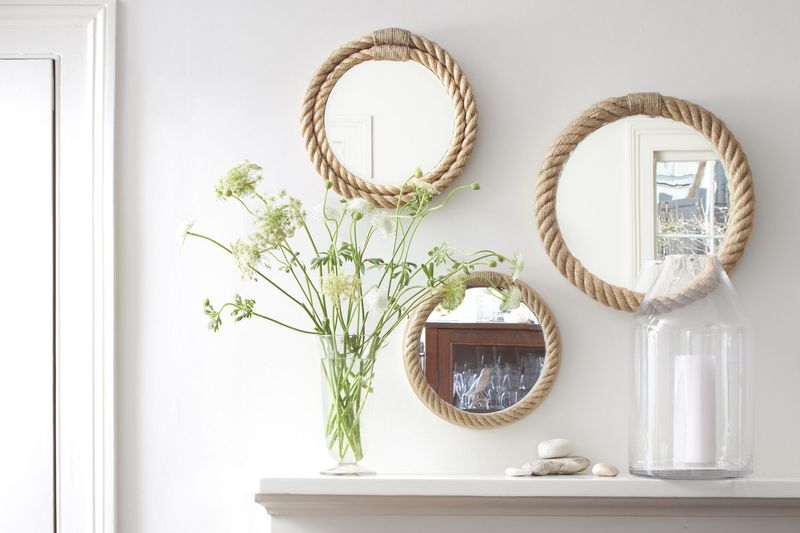
Mirrors aren’t just for checking your appearance they’re secret weapons for creating depth! I place decorative objects in front of mirrors to create beautiful reflections that double visual impact. This technique works wonderfully on mantels, console tables, and shelves.
Try leaning a medium-sized mirror against the wall, then positioning a vase with fresh flowers or an interesting sculpture partially in front of it. The reflection creates a gorgeous backdrop that highlights your decor while adding dimension to the space.
For maximum effect, position mirrors where they’ll reflect something beautiful like window light or an art piece. This technique also works with mirrored trays under decorative objects. The reflective surface adds sparkle and makes simple arrangements feel more luxurious. Even small mirrors make a big difference in creating that layered, professional look.
13. Incorporate Different Lighting Levels
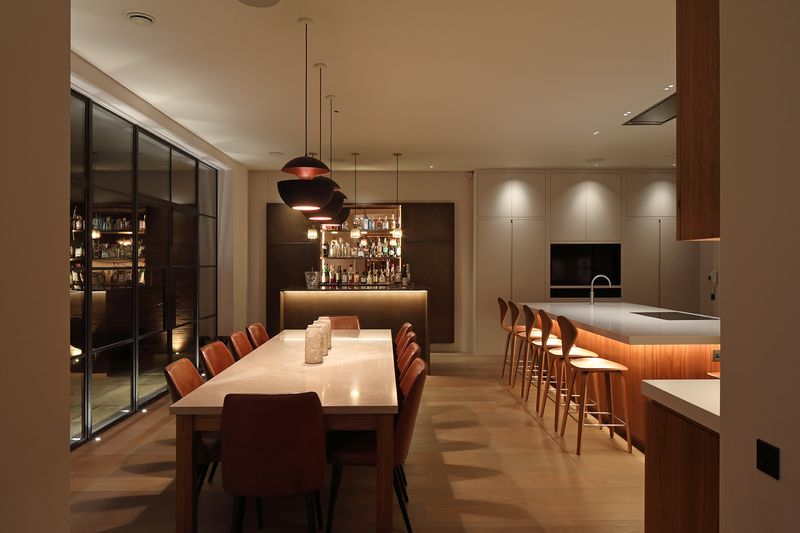
Harsh overhead lighting flattens a room, but layered lighting transforms it. I create depth by combining ambient (general), task (functional), and accent (decorative) lighting at different heights. This multi-level approach mimics natural light’s complexity and creates a warm, inviting atmosphere.
Floor lamps add mid-level light while table lamps create intimate pools of illumination. Wall sconces draw the eye upward and highlight architectural features. For maximum flexibility, put main light sources on dimmers to adjust the mood easily.
Don’t forget about light temperature! Warm bulbs (2700-3000K) create cozy, inviting spaces, while cooler temperatures work better in kitchens and bathrooms. This thoughtful approach to lighting creates dimension even in simple rooms and is one of the most impactful ways to achieve that professional designer look.
14. Display Collections for Personality
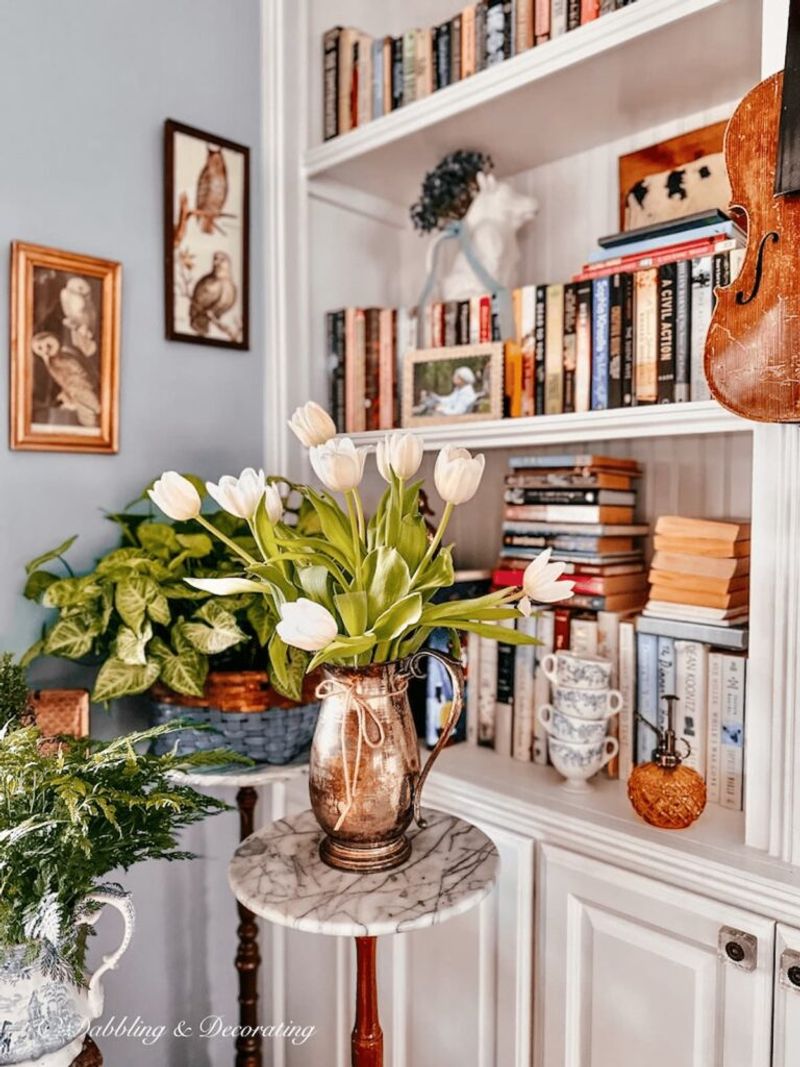
Random decorative objects often look like clutter, but grouped collections create intentional style moments. Whether vintage cameras, colorful pottery, or antique books, I display related items together for maximum impact. This technique adds personality while still feeling cohesive.
The key is thoughtful arrangement. Group similar items by color, size, or theme rather than scattering them throughout a space. Create visual rhythm by varying heights and leaving breathing room between pieces. For larger collections, rotate items seasonally to keep displays fresh without overwhelming the space. Even everyday objects become special when collected and displayed thoughtfully.
Vintage kitchen tools on a wall, colorful glassware on open shelving, or beautiful bottles on a tray these curated groupings tell your story while adding that layered, collected-over-time look that professional designers achieve.
15. Place Trays to Corral Small Items
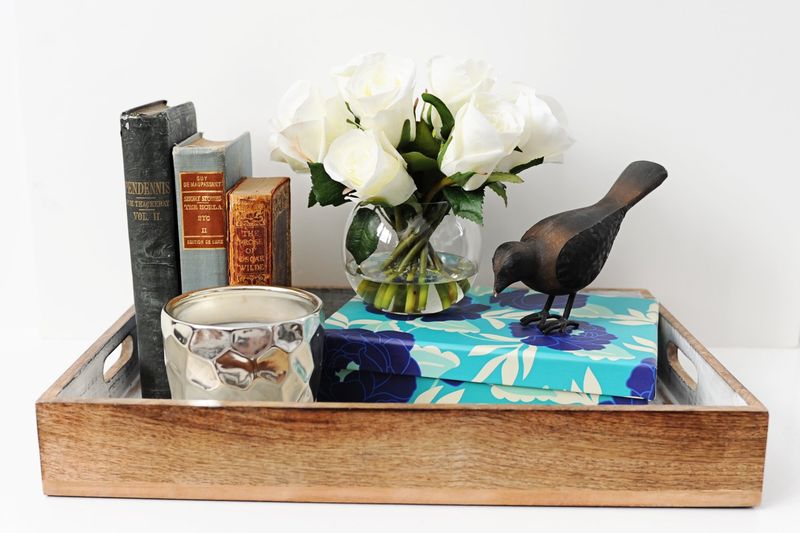
Scattered small objects read as clutter, but the same items on a decorative tray instantly become a styled vignette. I use trays on coffee tables, dressers, and vanities to transform necessary items into intentional arrangements. This simple boundary creates visual organization while adding another textural element.
Material matters here mirrored trays add glamour, wooden trays bring warmth, while lacquered or metal options create contemporary polish. The contrast between the tray and the surface it sits on adds another layer of visual interest. Beyond beautifying everyday items, trays make functional spaces feel more designed.
A tray of coffee essentials becomes a cafe moment. Bathroom toiletries look spa-like when arranged on a beautiful tray. This technique brings order to chaos while adding that finished, layered quality that distinguishes amateur from professional styling.
16. Style Shelves with Art, Books, and Objects
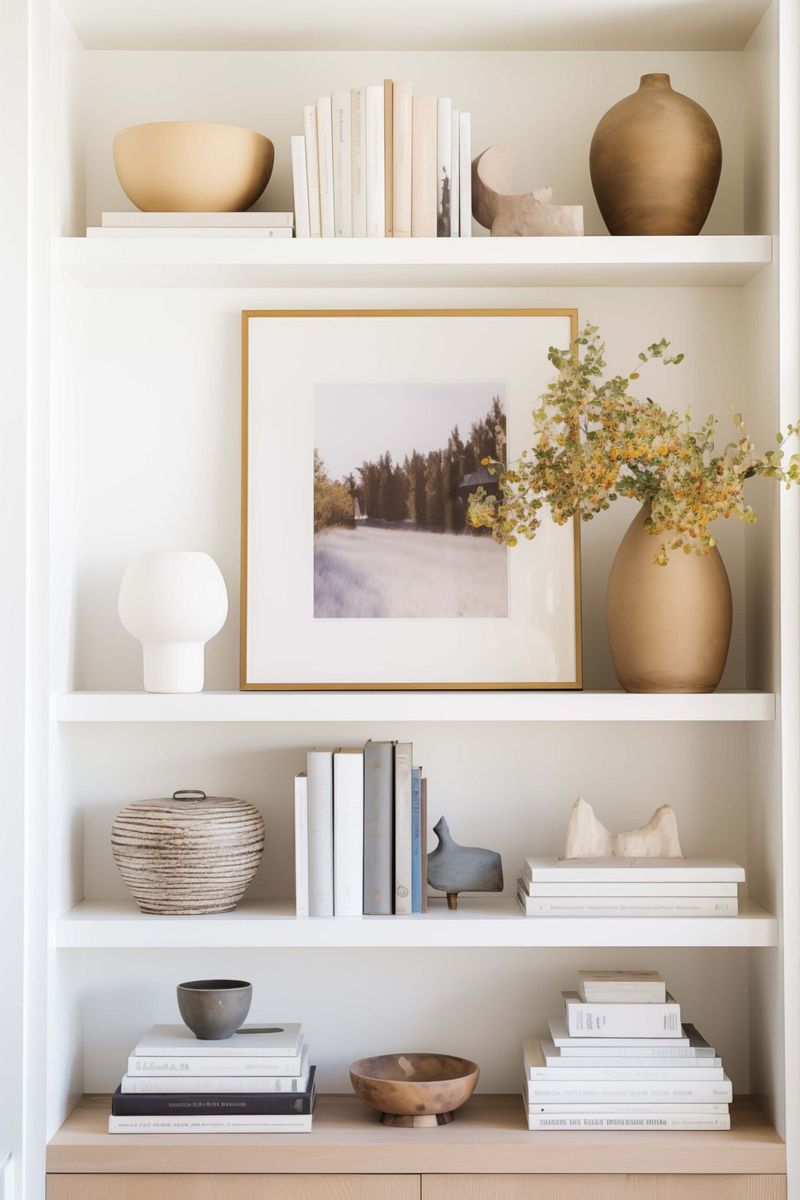
Perfectly styled shelves combine three key elements: books, decorative objects, and artwork. I create dynamic arrangements by varying these components across shelves rather than following the same pattern on each level. This prevents the static, catalog-like appearance that makes spaces feel flat.
Books work wonderfully as both functional items and design elements. Try arranging some vertically as usual, then creating horizontal stacks as pedestals for smaller objects. Leave negative space around special pieces not every inch needs filling! Incorporate small framed art or photos leaned against the back of shelves for unexpected dimension.
This creates a layered effect that draws the eye inward. The most professional-looking shelves tell a visual story through carefully curated items rather than displaying everything at once.
17. Vary Heights in Tabletop Decor
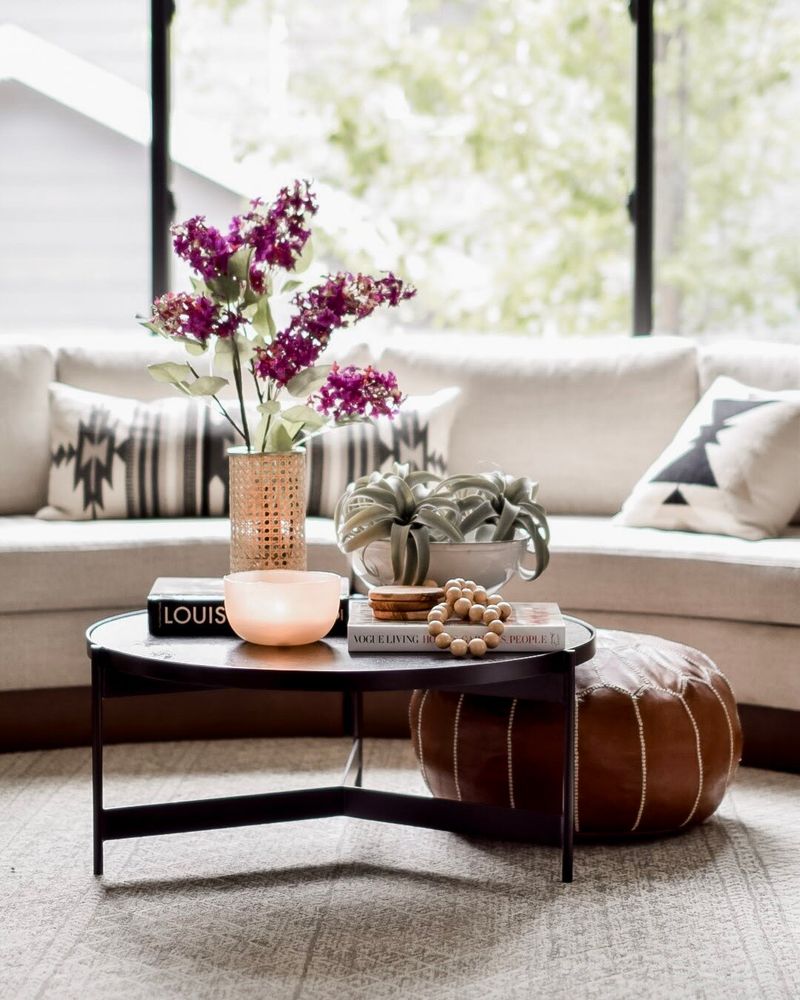
Flat tabletop arrangements lack dimension, but varying heights creates instant visual interest. I follow the “high, medium, low” rule when styling coffee tables, console tables, or dining centerpieces. This creates a pleasing rhythm that guides the eye across the arrangement.
For coffee tables, try a tall vase or candlestick, medium-height stack of books, and a low decorative bowl or tray. The height differences create natural movement and prevent the arrangement from feeling static. Remember to consider the table’s function leave space for drinks on coffee tables or sight lines across dining tables.
If you’re unsure about proportions, the tallest element should generally be about 1.5 times the height of the container (vase, bowl) it’s in. This simple height-varying technique transforms basic surfaces into designer-worthy vignettes that feel intentionally curated.
18. Use Accent Rugs Over Larger Rugs
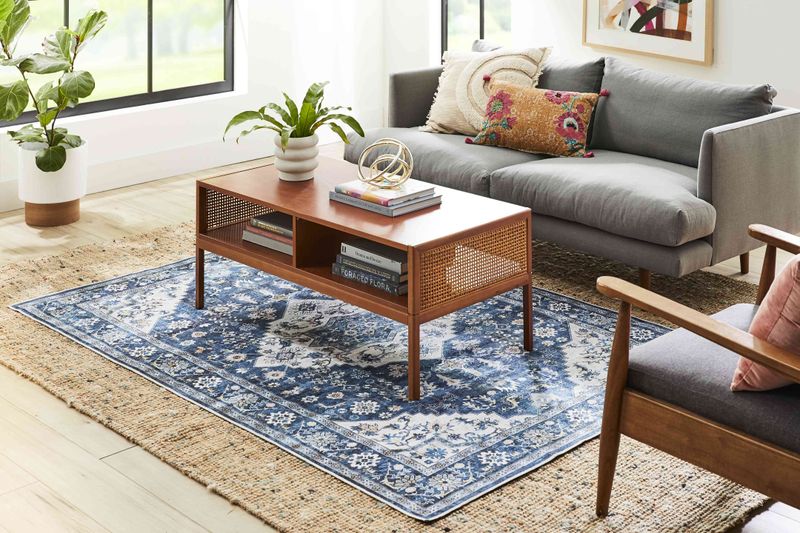
Beyond living rooms, this layering technique works wonders in bedrooms. I place smaller accent rugs over larger base rugs to define specific areas while adding color and pattern. This creates a luxurious, thoughtfully designed feel that basic single-rug rooms lack. In bedrooms, try a large neutral rug under the bed with smaller, more colorful rugs at the foot or sides.
This frames the bed beautifully while providing soft landing spots for bare feet. The contrast between the rugs adds visual interest even in minimalist spaces. When selecting accent rugs, choose pieces that complement rather than match the base rug.
Perhaps a textured solid over a subtle pattern, or a geometric design over a natural fiber base. This layered approach to floor coverings instantly elevates rooms beyond basic decorating into professional design territory.
19. Add Subtle Scent Layers with Candles or Diffusers
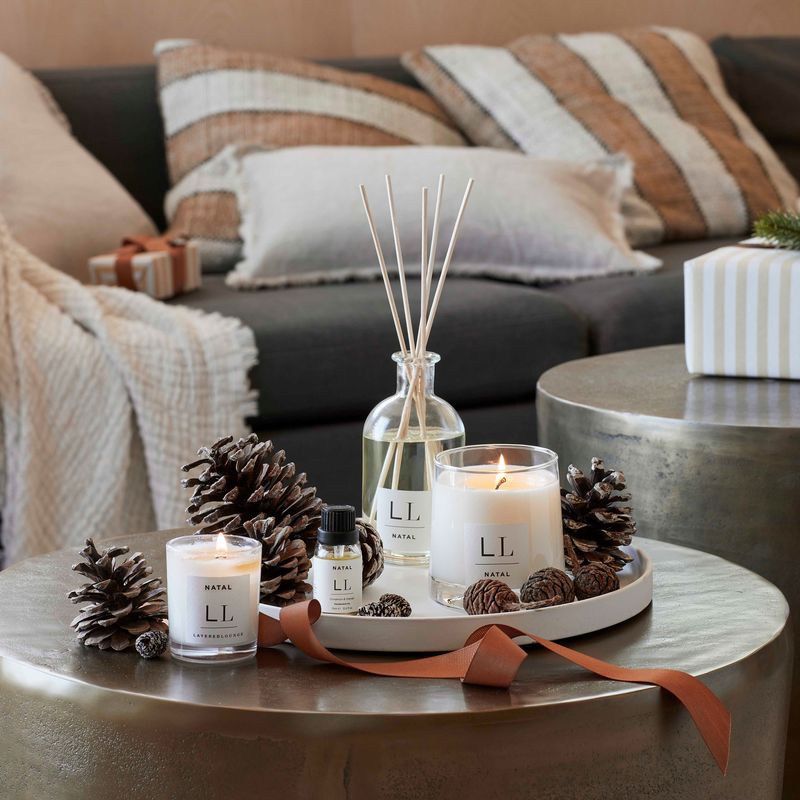
Professional designers know styling goes beyond the visual – scent creates another dimension of layering. I strategically place candles and diffusers throughout my home to create subtle scent zones that enhance the atmosphere of each space.
This invisible layer makes rooms feel complete and considered. Different rooms benefit from different scent profiles. Energizing citrus works beautifully in kitchens and home offices, while lavender or vanilla creates relaxing bedroom environments. For living areas, try woody or herbal scents that welcome without overwhelming.
The key is subtlety scents should be discovered, not announced. Place diffusers near natural air circulation points and candles where their vessels contribute to your decor even when unlit. This multi-sensory approach to layering separates thoughtfully designed spaces from merely decorated ones.

