30 Smart Home Decorating Ideas That Cost Almost Nothing
Transforming your living space doesn’t require emptying your wallet. With a little creativity and some elbow grease, you can refresh your home’s look without spending much at all.
I’ve gathered 30 clever decorating ideas that use items you might already have or can find for pennies. Ready to give your home a stylish makeover on a shoestring budget?
1. Repurposed Mason Jar Organizers
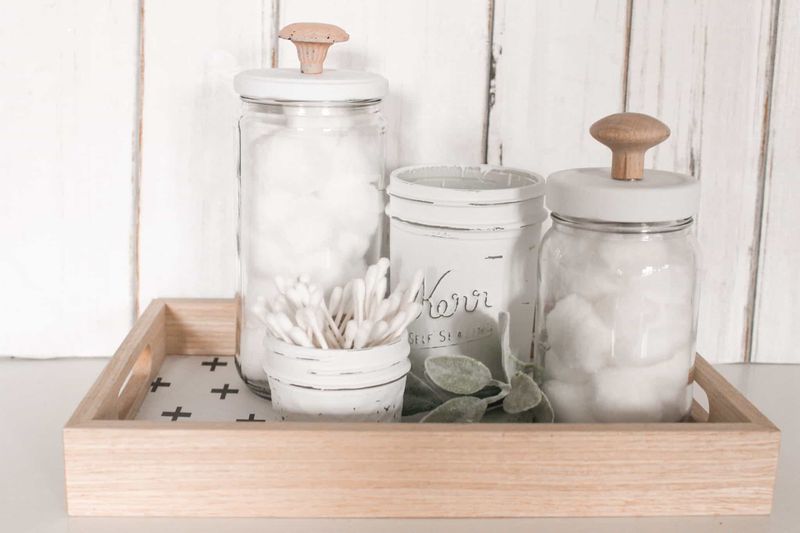
Got some old mason jars collecting dust? Put them to work! Clean them thoroughly, then use them to organize everything from cotton balls in your bathroom to pencils on your desk. You can leave them clear for a minimalist look or paint them in colors that match your decor.
For extra charm, tie twine or ribbon around the neck of the jar. They’re not just practical they add a touch of rustic charm to any room without costing you more than the price of paint you might already have.
2. Floating Book Shelves
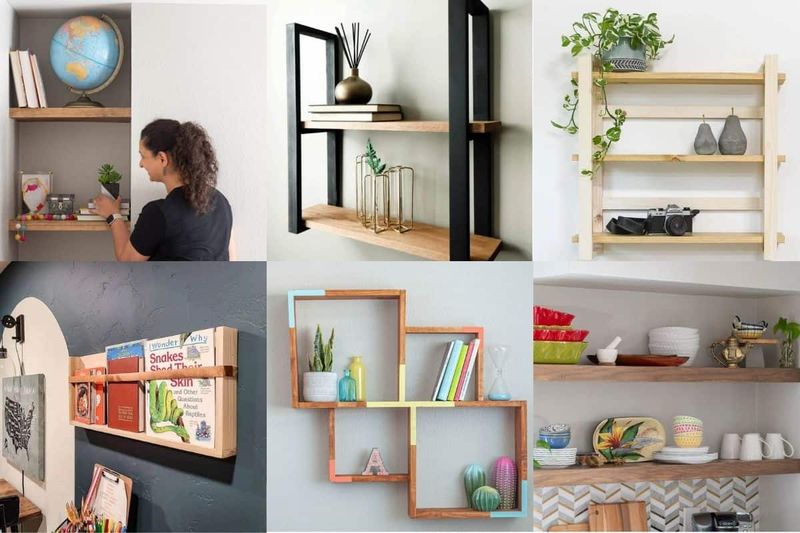
My friends always ask about my floating bookshelves they can’t believe I made them from old hardcover books and L-brackets! The trick is finding hardcovers at thrift stores for under a dollar each. Attach an L-bracket to the wall, slip it between the cover and pages of the book, then screw the cover to the bracket.
Stack a few books on top of your “shelf” book, and you’ve got a magical floating bookshelf! The bottom book appears to float while supporting the others above it.
3. Frame Your Children’s Art
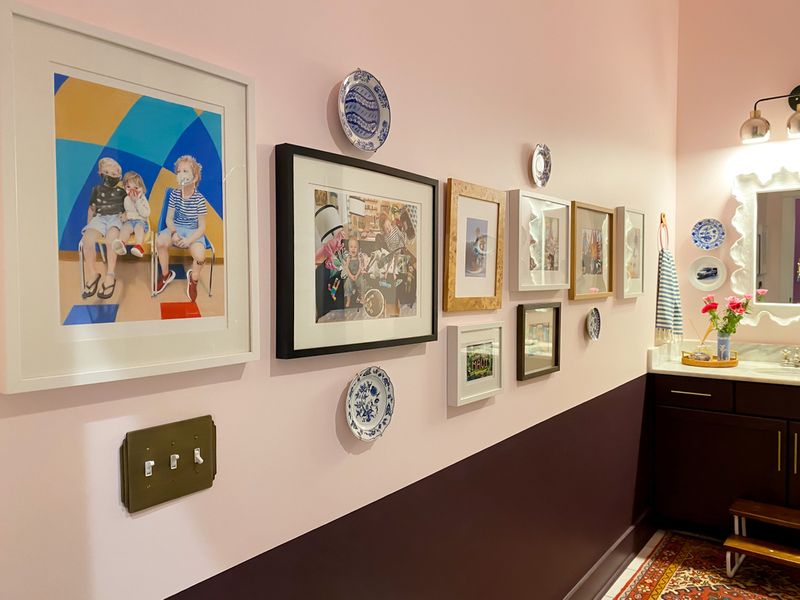
Those refrigerator masterpieces deserve better treatment! I gathered my kids’ best artwork and framed it using dollar store frames. With a quick coat of spray paint, even mismatched frames look like a cohesive gallery set.
Arrange them in a grid or flowing pattern on your wall for instant personalized art. Rotate pieces seasonally to keep the display fresh and your little artists motivated. Visitors always comment on our unique art gallery, never guessing the entire display cost less than $20 to create.
4. Fabric-Covered Storage Boxes
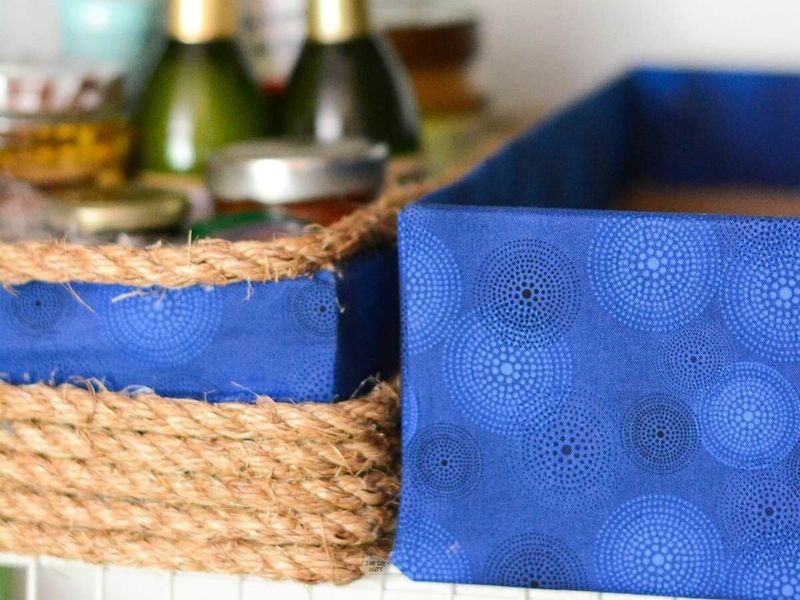
Cardboard boxes from recent deliveries can transform into stylish storage solutions! I’ve turned ordinary shipping boxes into decorative organizers using fabric scraps and basic craft glue. Simply cut fabric about two inches larger than each side of your box.
Apply glue to one side at a time, press the fabric down, and fold the excess neatly at the corners like wrapping a present. Place these in your closet, under the bed, or on open shelving for practical storage that actually enhances your decor rather than detracting from it.
5. Wine Cork Bulletin Board
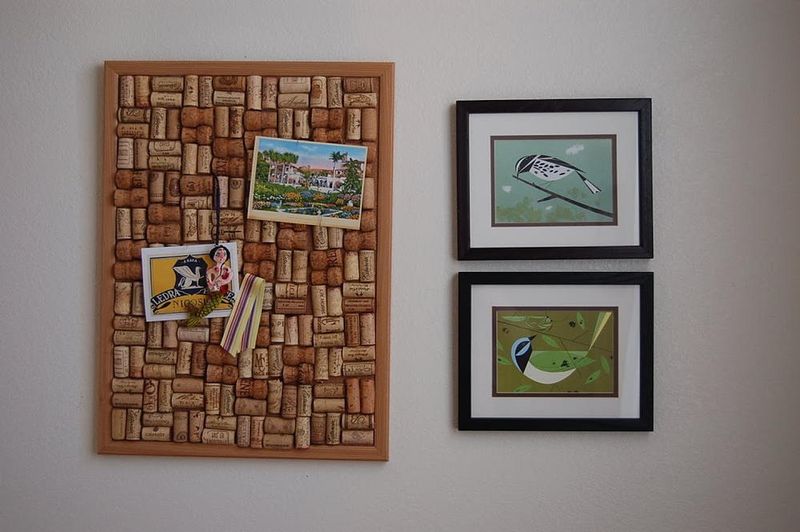
Wine lovers, rejoice! Your collection of corks can become a functional piece of wall art. I saved corks for months (the fun part!) then arranged them inside an old picture frame with the glass removed. Using a hot glue gun, I attached them side-by-side, creating a textured surface perfect for pinning notes and photos.
The natural variations in the corks create visual interest. Mounted in my kitchen, this board holds recipes and shopping lists while reminding me of good times shared with friends over those bottles.
6. Painted Terra Cotta Pots
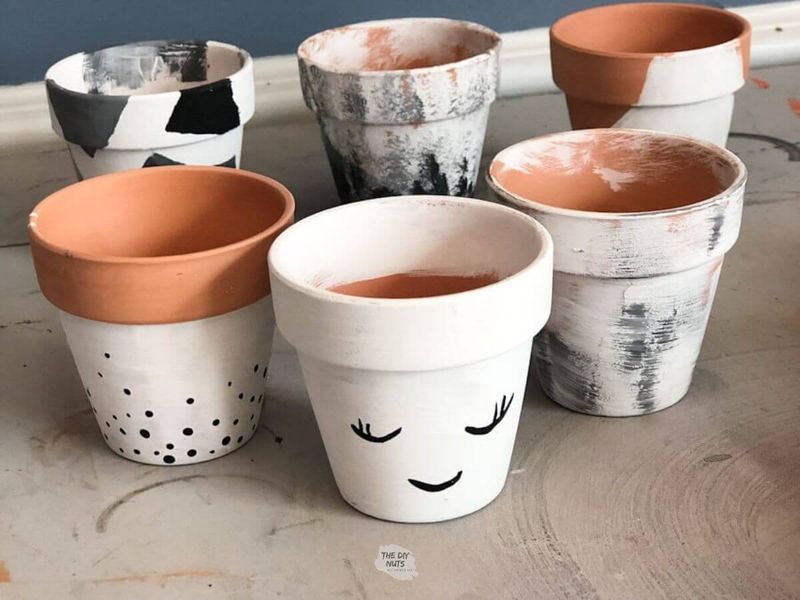
Plain terra cotta pots from the garden center cost next to nothing but look bland. A little leftover paint completely transforms them! I experimented with geometric patterns using painter’s tape as a guide.
For a modern look, try color blocking with contrasting colors. Or create an ombré effect by gradually mixing white paint into your base color as you work up the pot. Grouped together on a windowsill or shelf, these customized planters add personality to your houseplant collection and brighten any room especially during dreary winter months.
7. No-Sew Pillow Covers
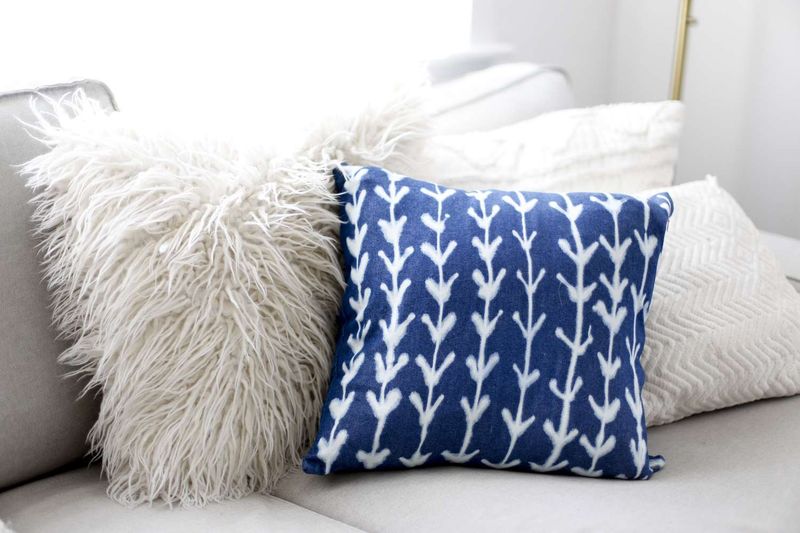
Fabric glue changed my decorating game forever! I found beautiful fabric remnants on clearance and transformed my tired throw pillows without threading a single needle. Cut two pieces of fabric slightly larger than your pillow, apply fabric glue along three edges, press together, and let dry.
Once set, turn right-side out, insert your pillow, and glue the final edge closed. My living room gets seasonal updates this way for under $5 per pillow. When styles change, I simply make new covers rather than buying all new pillows.
8. Branch Curtain Rod
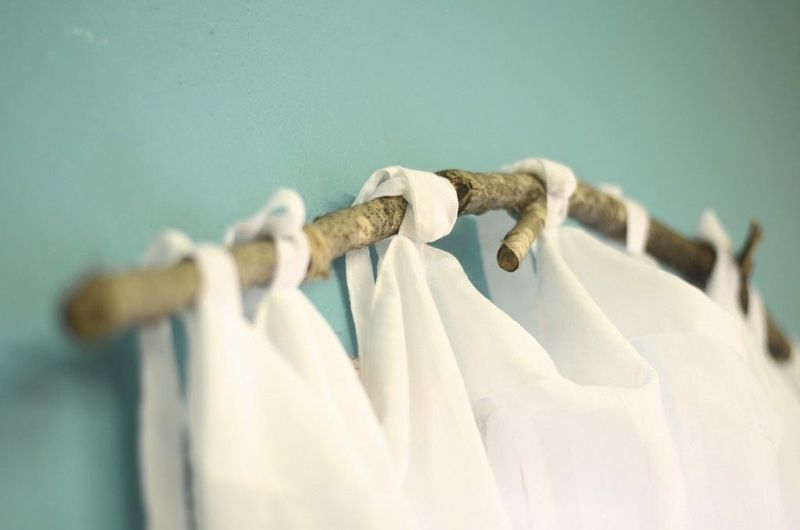
Mother Nature provides the most unique curtain rods for free! After a windstorm, I collected a fallen branch about 2 inches thick and slightly longer than my window. After removing any loose bark and sanding rough spots, I sealed it with clear polyurethane.
I mounted simple brackets to the wall above my window and rested the branch on them. Threading curtains with rod pockets works perfectly, or use curtain rings with clips for other styles. The organic shape brings natural warmth to my room that store-bought metal rods simply can’t match.
9. Washi Tape Wall Designs
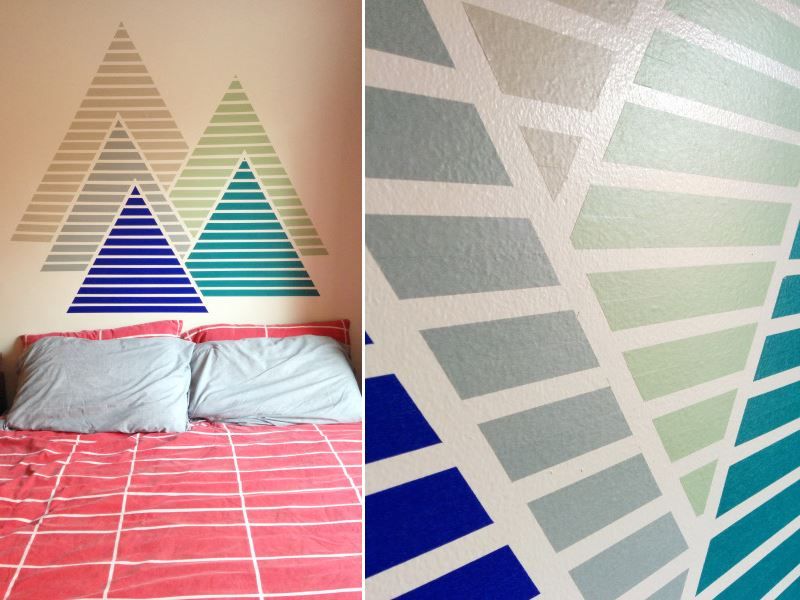
Temporary wall art doesn’t get easier than washi tape designs! This colorful Japanese masking tape comes in countless patterns and removes cleanly from most surfaces. Perfect for renters like me who can’t paint walls.
Create geometric shapes, frames around posters, or even a full accent wall with different tape patterns. I made a mountain range silhouette in my son’s room that took just 15 minutes and cost $3 in tape. The best part? When you’re ready for a change, it peels off without damaging paint or leaving sticky residue behind.
10. Rope-Wrapped Vases
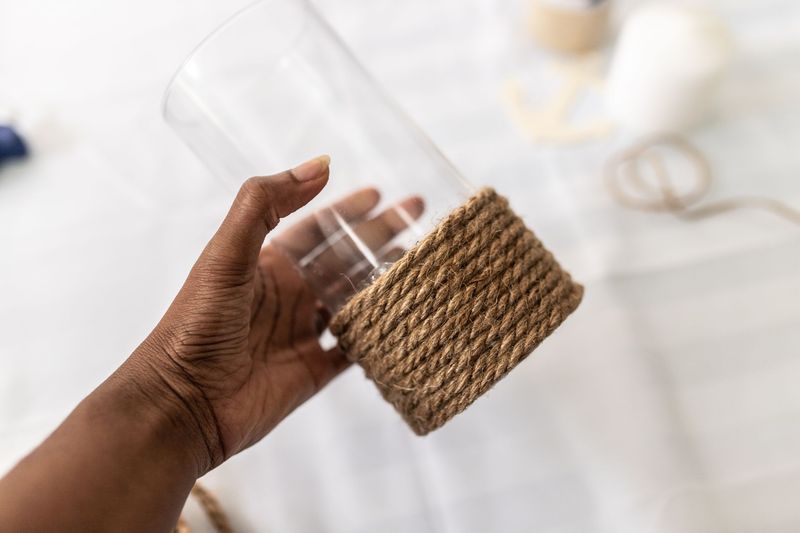
Plain glass vases from dollar stores become coastal-inspired decor with just a few yards of inexpensive rope or twine. I wrapped mine starting from the bottom, applying hot glue in small sections as I worked my way up. You can cover the entire vase for a rustic look or just wrap sections for a modern, color-blocked effect.
Leave the top edge natural glass for an interesting contrast. Filled with wildflowers or branches, these textured vases look like expensive boutique finds. I’ve even given them as housewarming gifts that friends thought came from high-end home stores!
11. Vintage Plate Wall Display
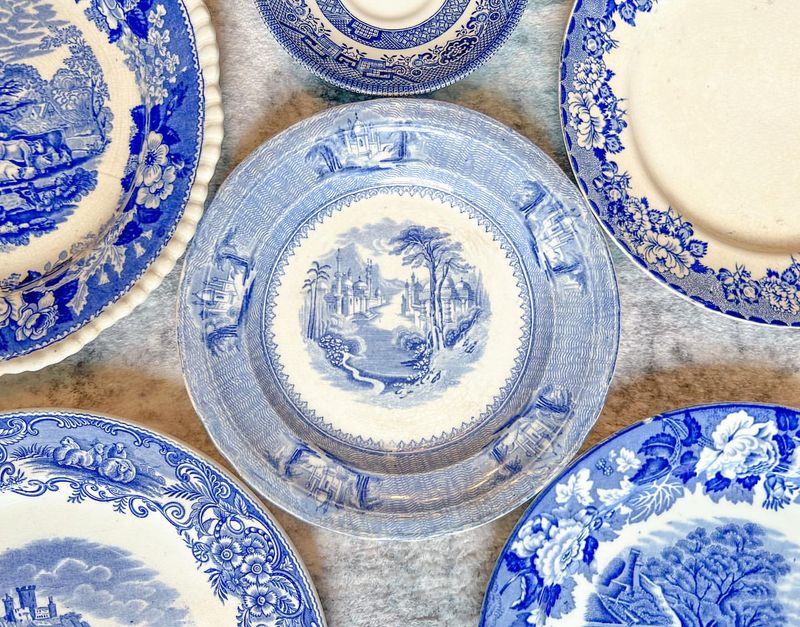
Thrift stores overflow with beautiful plates selling for pennies on the dollar. I’ve collected mismatched china with blue patterns that complement each other despite being from different sets. The total cost? Less than $15 for twelve plates!
Hanging them was simple with inexpensive plate hangers that grip the edges. I arranged them in a flowing pattern on my dining room wall, mixing sizes and designs. The result looks like an expensive curated collection rather than second-hand finds. Don’t limit yourself to matching sets the eclectic mix is what makes it special!
12. Drawer Pull Jewelry Organizer
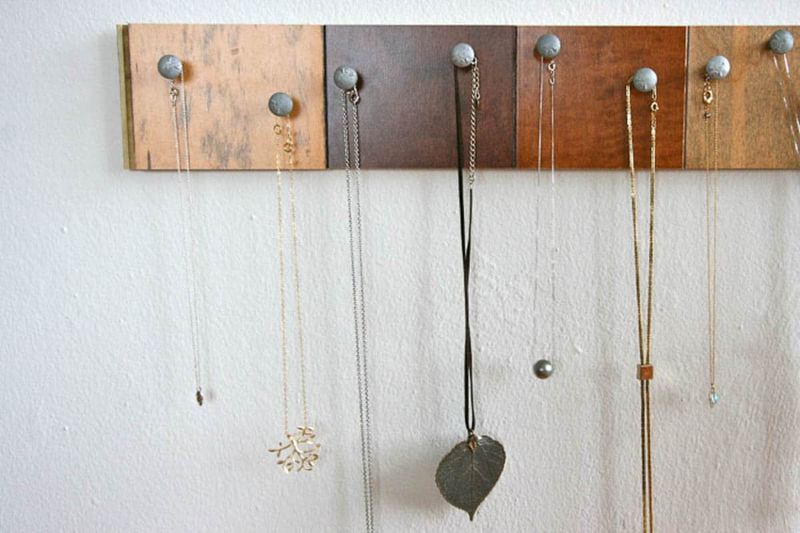
My tangled necklaces problem disappeared after I mounted decorative drawer pulls on a painted piece of scrap wood. Vintage-style knobs and handles can often be found in clearance bins at hardware stores for next to nothing.
I arranged them in two staggered rows, screwing them directly into the board. After adding a picture hanger on the back, my new jewelry organizer was ready to mount. Now my necklaces hang tangle-free, and my favorite pieces double as wall art. The whole project cost under $10 and took less than an hour to complete.
13. Map Covered Furniture
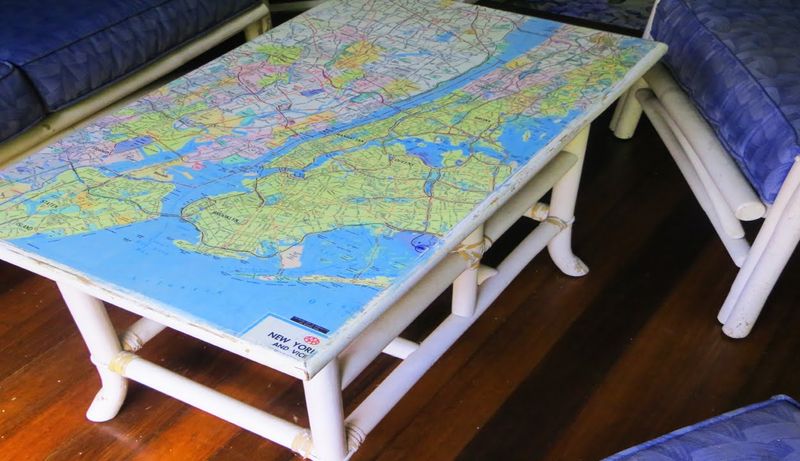
Road atlases and travel maps transform ordinary furniture into conversation pieces! I covered a tired side table using maps from destinations meaningful to our family, applying them with decoupage medium. The trick is cutting maps precisely for corners and edges, then applying multiple thin layers of sealer for durability.
For a coffee table, consider adding a glass top for protection. Beyond tables, this technique works for drawer fronts, trays, and even switch plates. My map-covered furniture tells our family’s travel story while hiding scratches and stains on well-loved pieces.
14. Teacup Candles
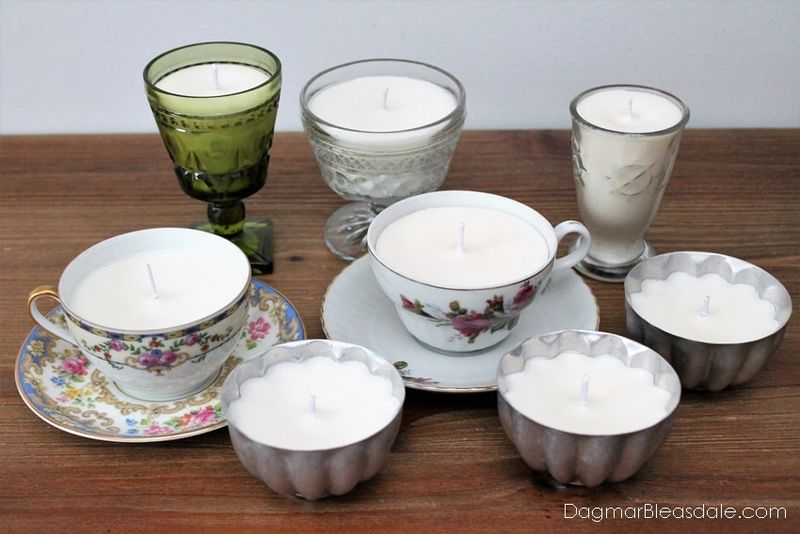
Orphaned teacups from thrift stores get a second life as charming candles in my home. For less than $1 per cup plus the cost of wax, I’ve created dozens of unique gifts and decorative accents. Melting candle wax (or even leftover candle stubs) in a double-boiler setup, I add a wick secured with a dab of hot glue at the bottom of each cup.
Pour in the melted wax and let set. Grouped on a vintage tray or scattered throughout your home, these candles add whimsical charm to any space and smell amazing with a few drops of essential oil added.
15. Painted Kitchen Canisters
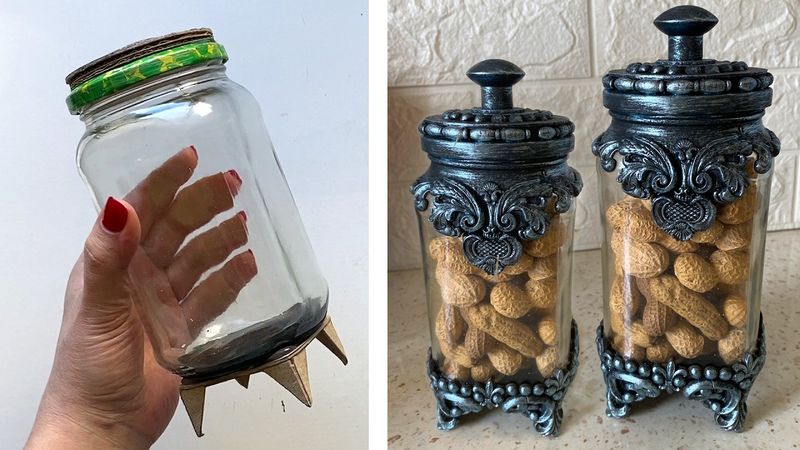
Plain glass jars from pasta sauce and pickles become stylish kitchen storage with a coat of paint and some creativity. After thoroughly cleaning and removing labels, I applied two coats of chalk paint to the exteriors. Once dry, I used letter stencils to label each jar with its contents: “Coffee,” “Sugar,” “Flour,” etc.
A light sanding on edges creates a farmhouse-worn look if desired. Matching containers would cost $30+ at home goods stores, but my upcycled set cost only the price of a small bottle of paint I already had for other projects.
16. Faux Stained Glass Windows
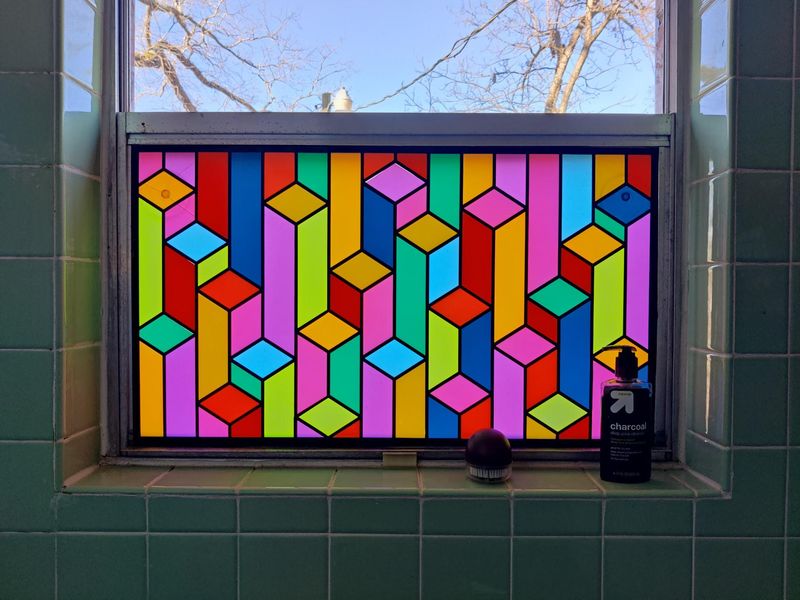
Liquid leading and glass paint transformed my plain bathroom window into a privacy solution that still lets in beautiful colored light. The supplies cost about $15 at the craft store far less than real stained glass or window films. I created a simple geometric design using the leading, let it dry overnight, then filled each section with translucent glass paints.
The result mimics authentic stained glass amazingly well! This works perfectly for rental properties since it can be peeled off glass when you move. I’ve even used this technique on picture frames for illuminated art pieces.
17. Painted Floor Stencils
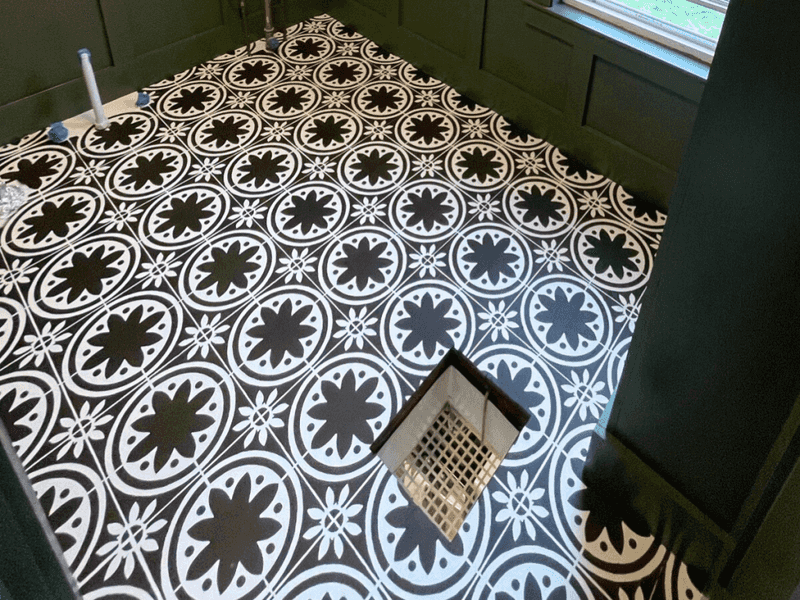
My dated vinyl kitchen floor got a dramatic makeover with just paint and a stencil. After thoroughly cleaning and priming the floor, I applied a base coat of porch paint in light gray. Using a $12 Moroccan tile stencil, I added a pattern with white paint, working in small sections and securing the stencil with painter’s tape.
Three coats of polyurethane sealer protect the design. Two years later, it still looks fantastic despite heavy foot traffic. The total cost was under $50 compared to $1,000+ for new flooring and completely transformed the room’s appearance.
18. Botanical Print Gallery Wall
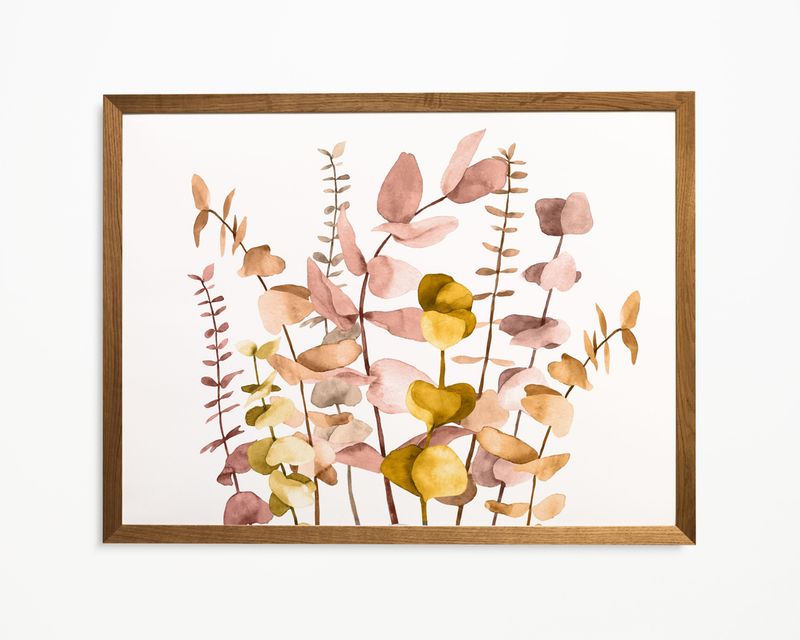
Beautiful vintage botanical illustrations are available free online from biodiversity libraries and museum archives. I downloaded high-resolution images, then printed them on quality paper at my local copy shop for 50 cents each.
Framed in second-hand frames painted white for consistency, they create a cohesive gallery wall that looks straight out of a design magazine. I arranged them in a grid pattern for maximum impact.
Visitors always ask where I purchased such lovely artwork, surprised to learn the entire display cost less than $20 including frames from the thrift store.
19. Wine Bottle Tiki Torches
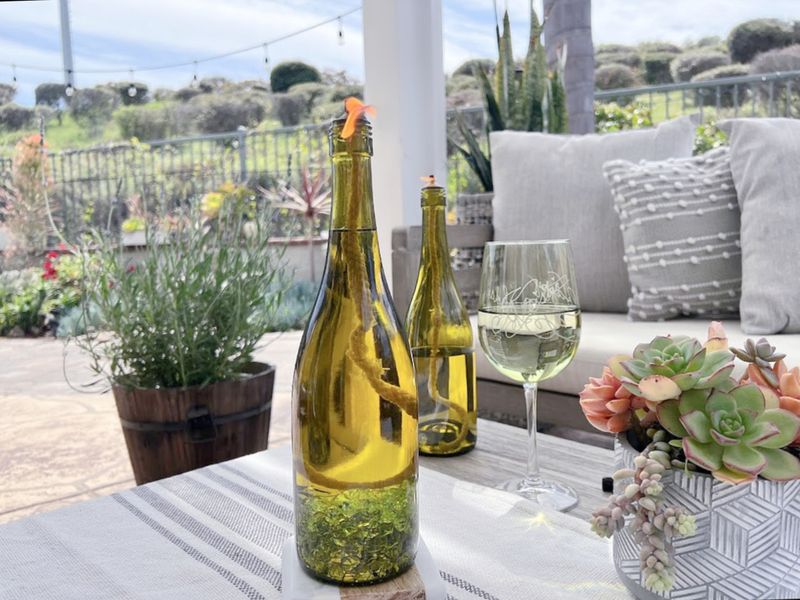
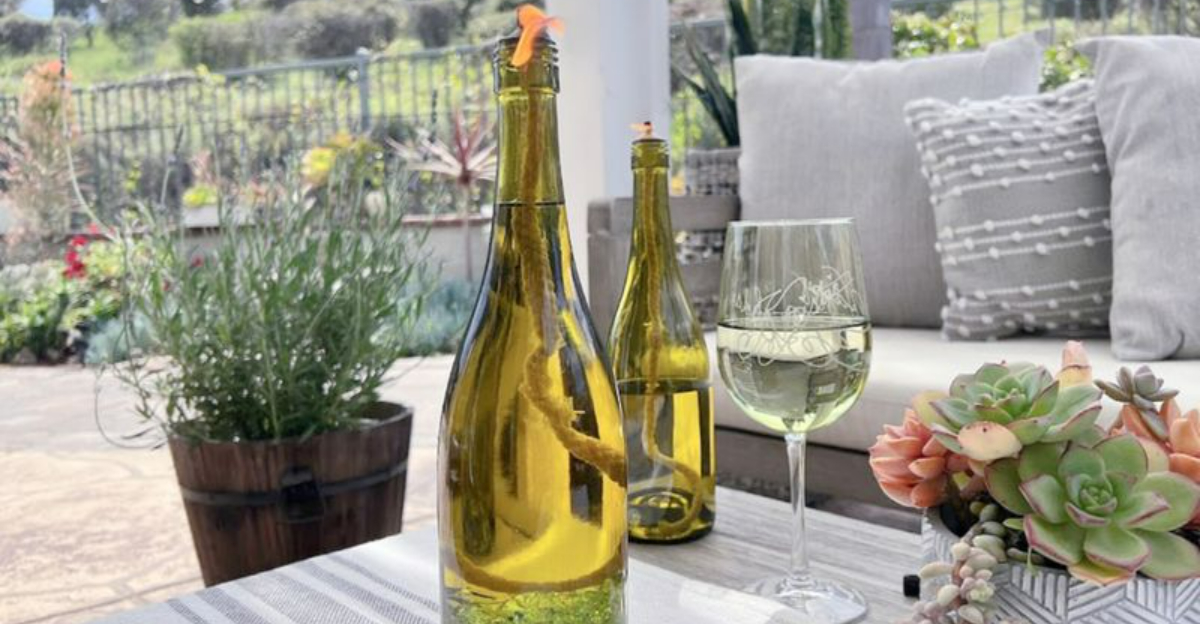
Summer evenings on my patio got an upgrade with wine bottle tiki torches that cost almost nothing to make. After collecting empty colored wine bottles, I purchased replacement torch wicks and fittings for about $2 each.
The fittings slip right into the bottle necks, and once filled with citronella oil, they provide both ambient lighting and mosquito protection. Mounting them on bamboo poles pushed into the ground elevates them to a safe height. The colored glass creates beautiful light patterns on nearby surfaces when lit. My friends now save their interesting bottles for my growing collection!
20. Painted Furniture Hardware
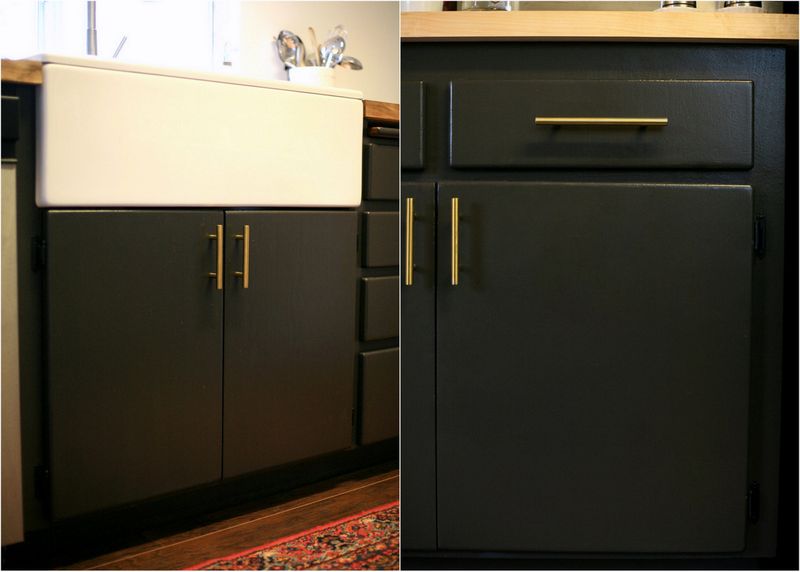
Outdated brass drawer pulls and knobs don’t require replacement just reimagination! I removed all the hardware from my dresser, cleaned it thoroughly with degreaser, then applied a metal primer spray. Two light coats of matte black spray paint later, my 1990s brass handles looked like expensive modern hardware.
For some pieces, I added gold tips by carefully applying gold leaf paint with a small brush. The transformation cost less than $10 for paint, compared to $50+ for new hardware. This technique works for everything from kitchen cabinets to bathroom vanities with spectacular results.
21. Floating Shelves From Scrap Wood
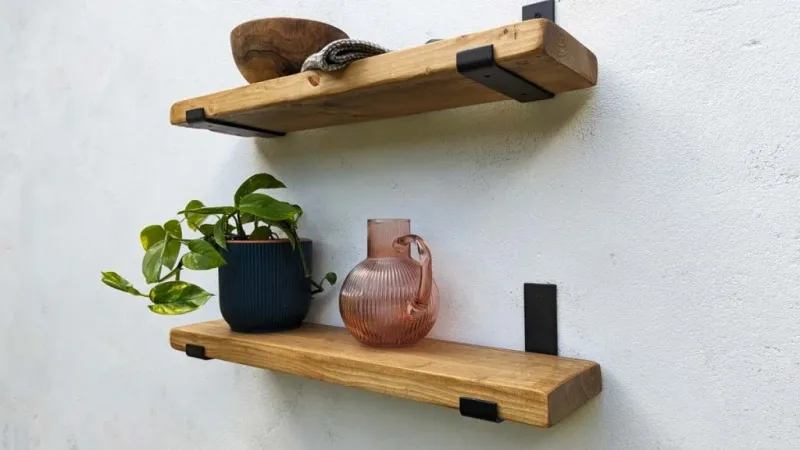
Construction site dumpsters (with permission!) yielded free lumber that became beautiful floating shelves in my living room. After cutting boards to my desired length, I sanded thoroughly and stained them in a warm walnut finish. Inexpensive hidden bracket systems from the hardware store provide invisible support.
I installed three staggered shelves on my wall, creating a striking display area for books and decorative objects. The industrial-modern look would have cost $40-60 per shelf at furniture stores. My version cost about $8 per shelf for brackets and stain, with lumber completely free.
22. Dip-Dyed Curtains
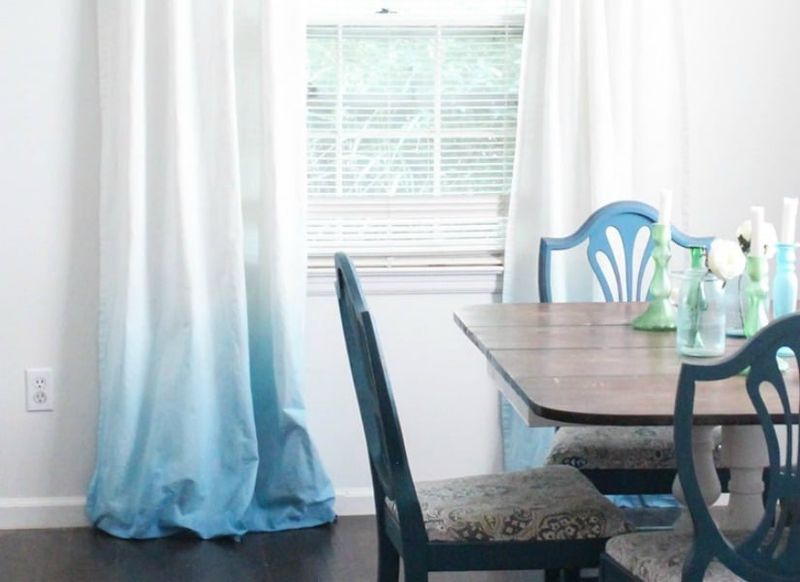
Plain white curtains from a discount store underwent a dramatic transformation in my bathtub! I mixed fabric dye according to package directions, then dipped just the bottom portion of each curtain panel into the dye bath. For an ombré effect, I gradually pulled the fabric out over 30 minutes, allowing different sections to absorb different amounts of color.
The result is a beautiful gradient from deep color at the bottom to white at the top. My windows now feature custom curtains that look like expensive designer pieces but cost less than $25 total for panels and dye.
23. Pallet Wood Headboard
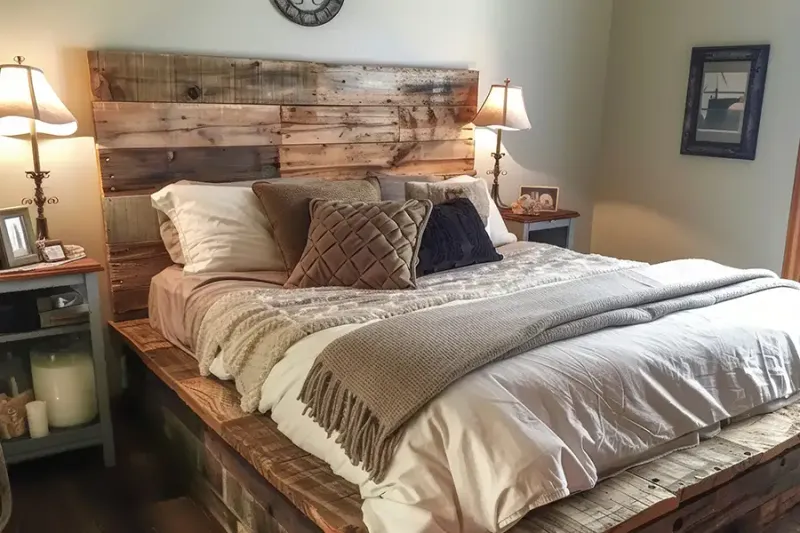
Free wooden pallets from behind local stores became a rustic-chic headboard that transformed my bedroom. After disassembling the pallets (the hardest part!), I selected the best boards and sanded them thoroughly to remove splinters.
Some pieces I stained darker, others I whitewashed, creating depth. Mounted to the wall behind my bed, this statement piece gives the room a custom, designer look that would cost hundreds at furniture stores.
24. Mirror Mosaic Wall Art
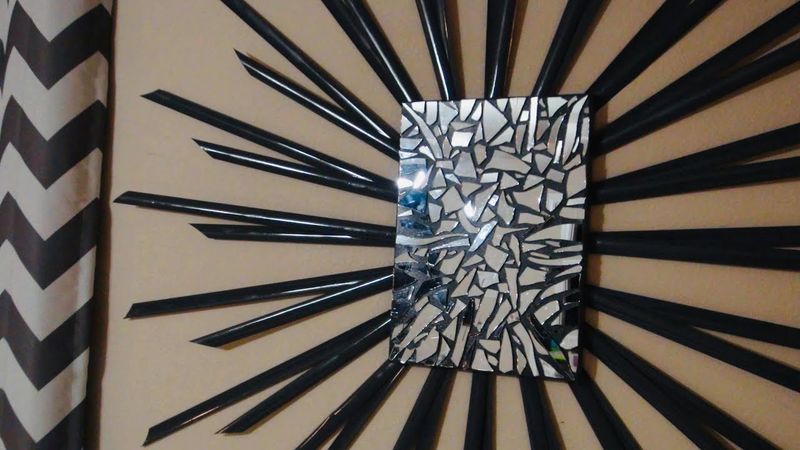
A broken wall mirror headed for the trash became stunning geometric wall art for my entryway! Wearing protective gloves, I carefully broke the mirror into triangular pieces of various sizes. On a painted wood backing board, I arranged the pieces in a starburst pattern, leaving small gaps between them.
Using mirror adhesive, I secured each piece, then filled the gaps with black grout for definition. The finished piece catches light from every angle, creating beautiful reflections and making my small entryway appear larger and brighter. Total cost: just $8 for adhesive and grout.
25. Vintage Suitcase Side Table
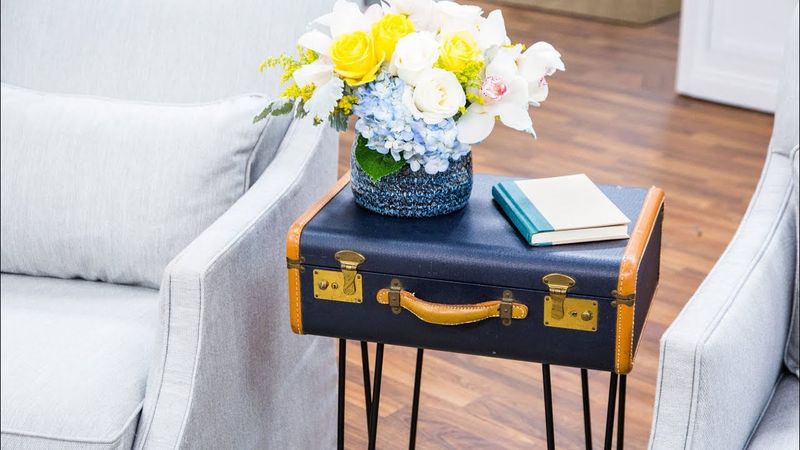
A $5 vintage suitcase from a yard sale now serves as both storage and a stylish side table in my guest room. I found hairpin legs online for $15 the only real expense for this project. After reinforcing the bottom interior with a piece of plywood for stability, I attached the legs using screws and washers.
The suitcase remains functional, opening to reveal storage space for guest linens and pillows. The worn leather exterior adds character and warmth to the room. Guests always comment on this unique piece that combines form and function so beautifully.
26. Macramé Plant Hangers
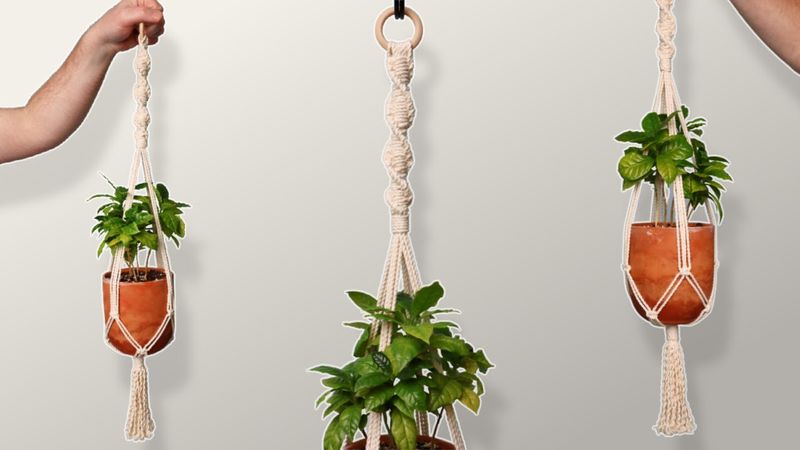
My houseplant collection gained vertical interest with handmade macramé hangers that cost just $3 each to make. Using simple cotton rope from the hardware store, I followed free online tutorials to master a few basic knots.
The beauty of macramé is that even beginner-level projects look impressive. My first attempts now hang proudly in my kitchen window, holding small pothos and spider plants. As my skills improved, I created more complex designs for larger plants. The natural rope texture adds warmth and bohemian character to my spaces while freeing up valuable surface area.
27. Contact Paper Countertop Makeover
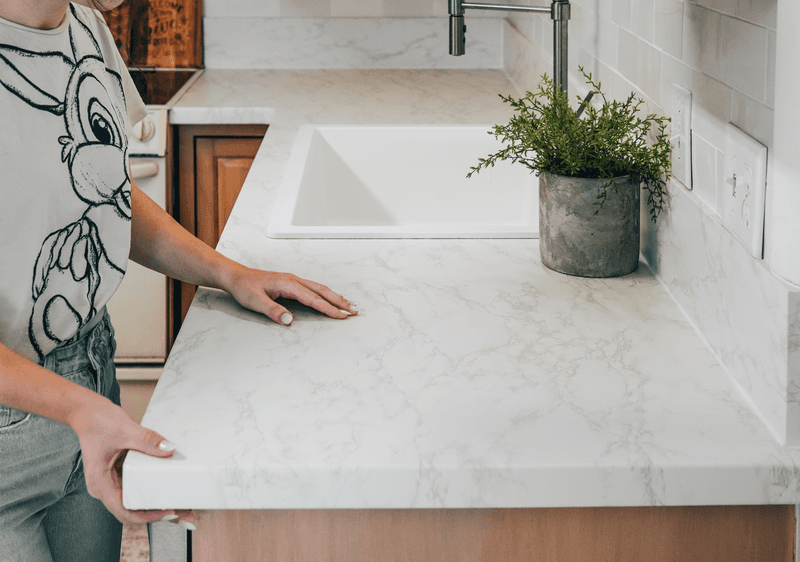
My outdated laminate kitchen counters got a remarkable facelift using marble-look contact paper that cost just $30 for the entire kitchen! The adhesive vinyl applies directly over clean, smooth surfaces. Working carefully in sections, I smoothed out air bubbles with a credit card as I went.
Precise cutting around the sink and edges gives a professional finish. For durability, I added several coats of clear polyurethane sealer. Two years later, it still looks convincingly like real marble. This temporary solution buys time for a proper renovation while making the kitchen look updated and fresh.
28. Painted Doormat
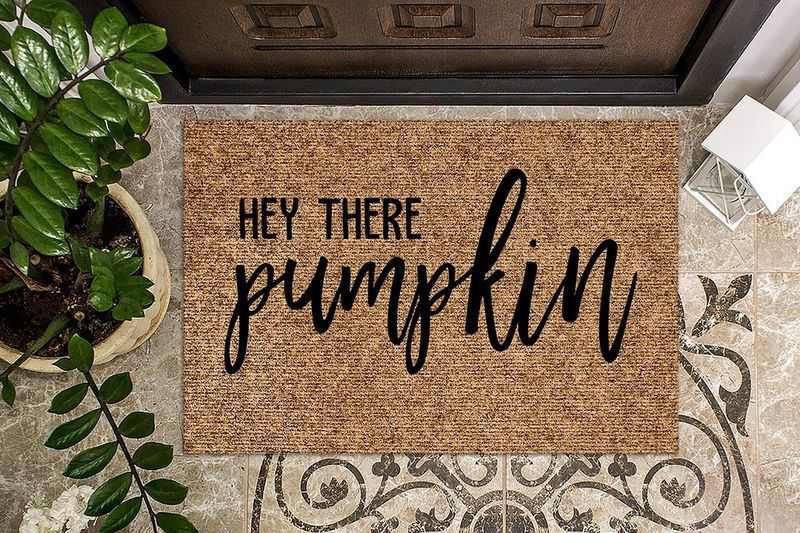
Plain coir doormats from discount stores become personalized statement pieces with a little paint and creativity. I purchased a basic $5 mat, then used acrylic paint mixed with textile medium to create a custom design. Stencils help achieve clean lines for patterns or lettering.
My mat features our family name and a simple geometric border. Two coats of clear outdoor sealer protect the design from weather and foot traffic. Custom doormats sell for $40+ online, but my DIY version cost less than $10 total and makes our entryway feel uniquely welcoming to visitors.
29. Vintage Book Wall Clock
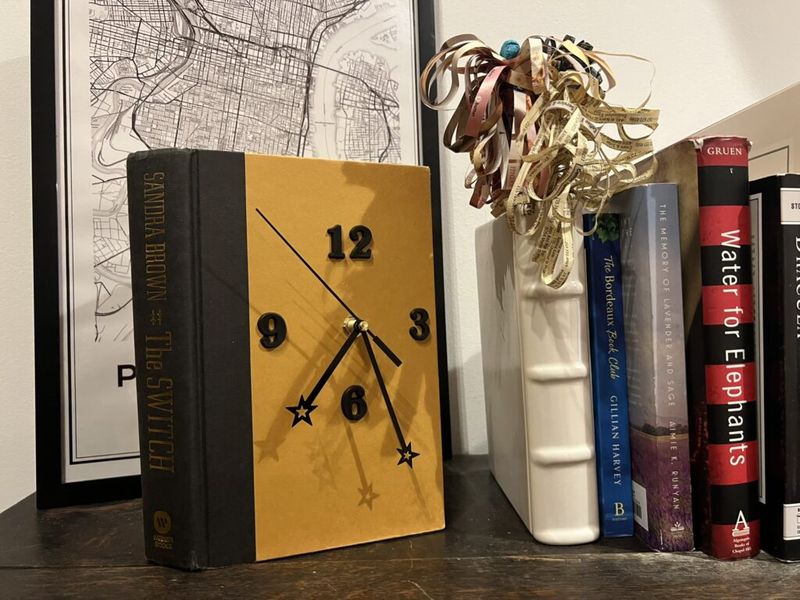
A hardcover book from the free bin at my local library became a unique wall clock that perfectly fits my home office literary theme. I hollowed out the middle of the book using a craft knife, creating space for an inexpensive clock mechanism purchased online for $8.
I drilled a small hole through the cover for the clock hands shaft, then assembled according to the mechanism’s instructions. The original book cover remains visible, making for a conversation-starting timepiece. Mounted on the wall, it looks like a book magically suspended with clock hands emerging from its cover.
30. Painted Tile Backsplash
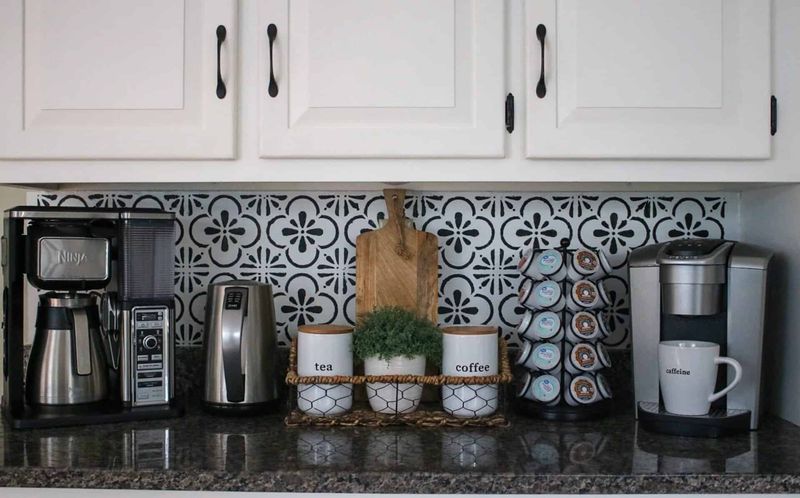
My dated kitchen backsplash tiles were functional but ugly until I transformed them with stencils and paint! After thorough cleaning and priming with a bonding primer, I applied a base coat of white tile paint. Using a Moroccan-inspired stencil, I added a pattern with light gray paint, working carefully on one tile at a time.
Three coats of clear sealer protect the design from water and cleaning. The entire project cost under $40 for paint and supplies, compared to $500+ for new tile installation. The pattern completely transforms the kitchen’s look without the mess of demolition.

