DIY Burlap Banner in 15 minutes

Hi guys! I’m back today with a cute little banner project. If you’re looking for something adorable to hang in your kids rooms, or even from your mantel (hello, Christmas banner!) – this project is for you!
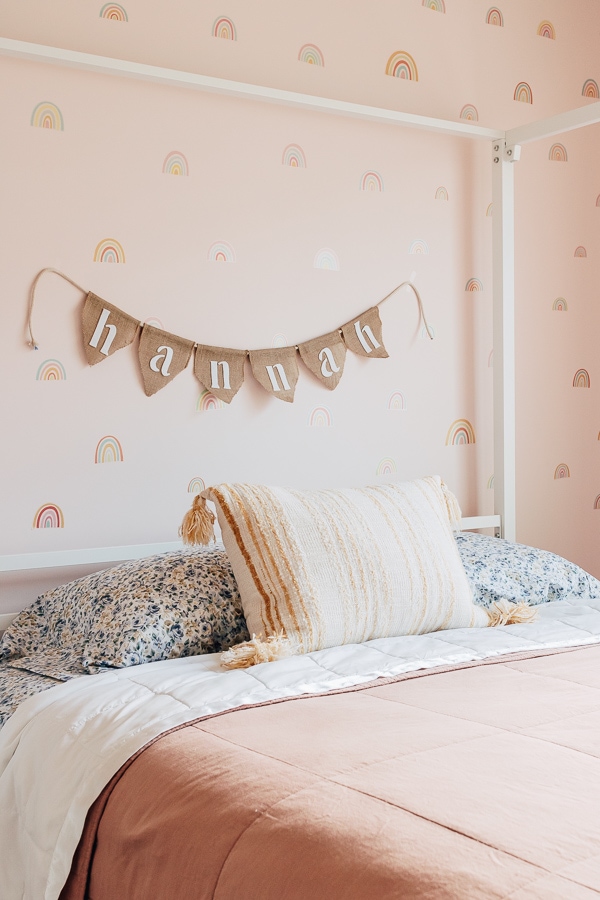
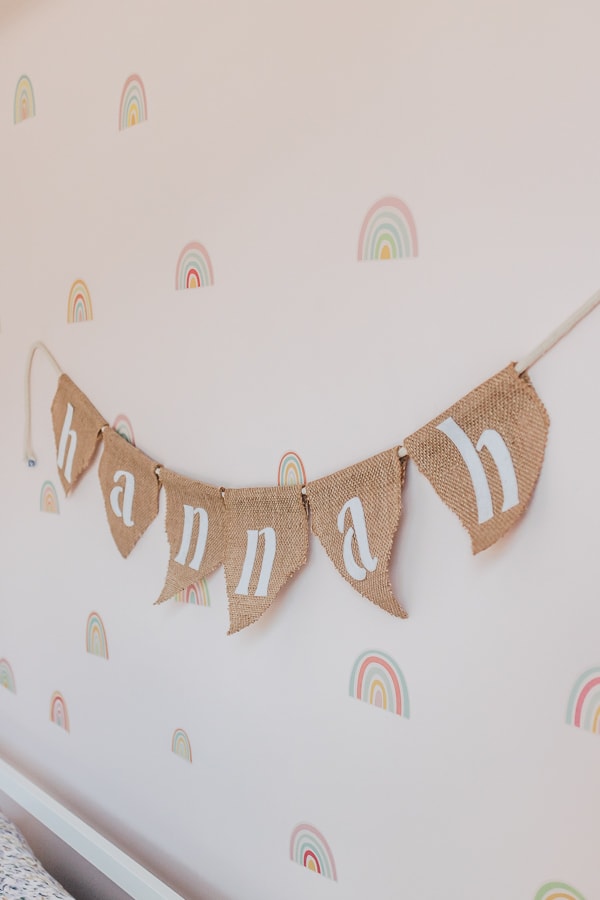
I made this adorable DIY burlap banner and personalized it with my daughter’s name. You probably have most of the materials you need already. Make sure to use your coupons if you stop by Michael’s or Joann craft stores.

This also comes together in about 15 minutes. Yay!
Things You’ll Need
- Burlap
- Pinking Shears (see note) or Scissors
- Hot Glue Gun
- Sticky Felt Sheet
- Rope
- Letter Stencils (optional)

Note: I used pinking shears to cut each shape out of burlap. Pinking shears generally help with fraying. You don’t need to use pinking shears for this project, however. You can cut your pieces out using scissors, and then apply a layer of Mod Podge to the edges to help prevent fraying.
You don’t have to use stencils for this project, but I wanted my letters to be nice and neat and I’m horrible at freehand letters. I found a set of reusable letter stencils from Joann and used a coupon of course. They sell these stencils everywhere, including Amazon.
DIY Burlap Banner Tutorial
Follow these easy steps to create your banner. And watch the video if you need a visual.


- Cut a number of rectangles out of burlap. Then, cut a pointed edge at the bottom. You can fold in each side equally and then cut along the fold for a perfect point.
- Using your stencils, trace your letters onto sticky felt. I traced them on the back to keep it easy and prevent ink marks on the felt. If you do this, just be sure to trace your stencils backward.
- Cut your letters out of the felt and then stick them directly on your burlap pieces. These felt letters can be removed and repositioned if needed. Once you are happy with the placement, you can hot glue them down permanently if you want.
- Fold over a piece of burlap at the top and hot glue the edge down, creating a pocket.
- String your rope through these burlap pockets and hang.
That’s it! I told you this was so simple.


You might also like: DIY Kids Bunting
Frequently Asked Questions
How do you prevent fraying on your burlap banner?
I used pinking shears to make my cuts, which may have helped a little bit. But here are a few more ideas for you.
- You can sew a quick zig-zag stitch along the edges.
- Use ribbon burlap instead of burlap fabric, so the sides are already sealed (less fraying all around.)
- Paint a layer of mod podge along the bottom.
- Add a little fabric or ribbon border to the edges and secure with hot glue. The ribbon will hide the frays and the hot glue will hold it all in place.
Can you Paint on Burlap?
Yes, you can! You can use spray paint, chalk paint, or acrylic paint on burlap. I also tried using a sharpie and a chalk marker but that didn’t work so well. In my opinion, the best way to put words on burlap is to use felt, cut the letters out, and stick them on. This really makes the words pop and creates a 3D effect. They sell sticky felt in all kinds of colors, so you are not just limited to white.
Is this banner just for kids rooms and nurseries?
Nope! You could easily make one of these for any holiday – just replace the name with a holiday sentiment and hang from a window or your fireplace mantel.
How cute is this banner though?

I hung this behind my daughter’s bed with some tape. It’s light enough and hopefully, it will stay!
What do you guys think of this DIY burlap banner? By the way, this is a fun thing for kiddos to do too, and it gives them lots of cutting practice.
I hope you guys enjoyed – have fun and thanks for visiting me today!
Xo Karen

