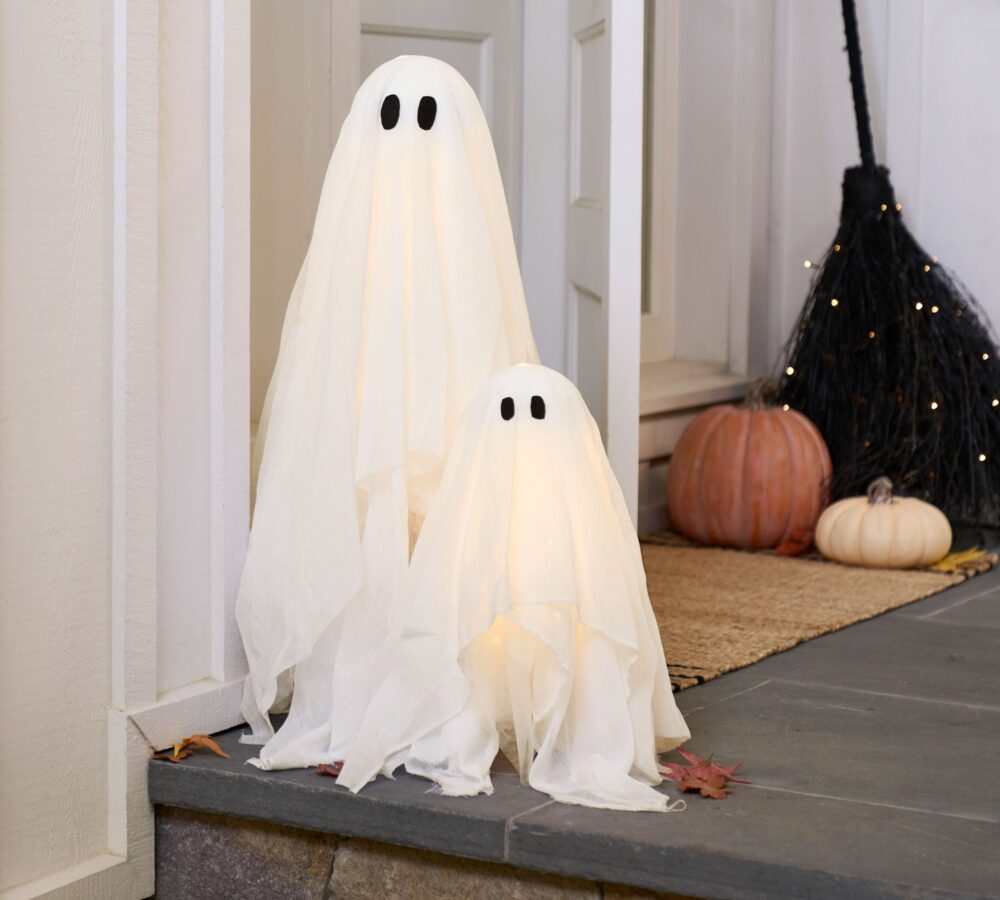
Spooky DIY Tomato Cage Ghosts

This post contains affiliate links, which means we may earn a small commission if you purchase through them — at no additional cost to you. Please see our policy page for more details.
I’ve been seeing these tomato cage ghosts everywhere and just had to make one myself! If you’ve been seeing this and wanting to make one yourself, you’re in luck. Today, I’m sharing the full tutorial for making these DIY tomato cage ghosts.
This project is incredibly easy and budget-friendly to boot. I wish I could say I came up with this idea, but I didn’t. I was inspired to remake and reshare with all of you. I was able to make these ghosts for about $30, all in (I already had everything except the heads, tomato cages and string lights).

I found the styrofoam heads at Joann’s and they were on sale! These heads are actually pumpkins with an eye on it, so I turned the eye part to the back. Trust me, you can’t even tell. You could also use pumpkin pails and styrofoam balls (but those were more expensive for reason). Michael’s and Amazon sell the styrofoam balls in various sizes.

Target and Walmart sell cheap sets of white sheets. I had an old set sitting in our linen closet – it was a queen set – and both the flat sheet and fitted sheet worked perfectly. Also check out the Dollar Store for creepy cloth!
Here’s what you’ll need.
Things You’ll Need
- Tomato Cages (small and large)
- String Lights
- Packing tape
- Rubber Bands
- 9 inch styrofoam balls or heads
- White Sheets
- Cheesecloth or White Creepy Cloth
- Black Felt
- craft glue (e6000)
- Rubber bands
- Scissors
- Rubber Mallet (optional – for hammering the head onto the cages)
watch the video
DIY Tomato Cage Ghosts with Lights

How to Create your Own DIY Halloween Ghosts with Lights (watch the video!)
Total time: 30 minutes
tie tomato cage together
Flip your tomato cages upside down, so the circle part is on the floor. Tie the three loose ends at the top together with rubber bands.
insert styrofoam ball on cage
Press your styrofoam ball on the tied points of the tomato cage. Carefully use a rubber mallet to help you.
wrap lights around cage
starting from the bottom, wrap lights all the way around the tomato cage and around the head area (taping them into place). Make sure to leave the plug accessible at the bottom.
place white sheet and creepy cloth over cage
place a white sheet and then a creepy cloth or cheesecloth over the tomato cage. Cut the bottom of these so they just graze the floor. It’s looking like a ghost already!
cut out and place felt eyes
cut out two eyes from a piece of black felt and use craft glue or hot glue to adhere them to the ghost head. Use your best judgment for placement. Note: I found the craft glue (e6000) to work a lot better than the hot glue.
turn on and enjoy!
Now just plug in your lighted ghost and enjoy!
How cute are these ghosts!? And yes, I will definitely be reusing them year after year. I’m going to store them with plastic bags over them and keep them in one of our closets. They should do fine.

I’m planning my Halloween front porch this year and can’t wait to show you. These ghosts will definitely be making an appearance. I haven’t decided if I’m going to hang witches hats yet.

Also, it’s probably best to have these lighted ghosts under a covered porch or inside. I’m not sure how well they would do exposed to harsh weather. If it’s a windy day, you can weigh down the bottom with some weights and cover the weights with the white sheet.
I hope you guys feel inspired to make a ghost, too. They’re booooootiful!


