The Easiest DIY Hanging Laundry Bag
This post contains affiliate links, which means we may earn a small commission if you purchase through them — at no additional cost to you. Please see our policy page for more details.
An easy tutorial for a DIY hanging laundry bag! I’m showing you two ways to make this – one is no sew!
This is an update to an old project I made a couple of years ago. The new version of this DIY hanging laundry bag requires no sewing. The sewing version is still included if you prefer that. Use the table of contents to get you to where you want to go. 🙂
I decided to redo this post because I need a hanging laundry hamper for my ORC laundry room makeover. Not sure what the ORC challenge is? You can check it out and all the other guest bloggers in this challenge by clicking here. We are almost to the finish line!

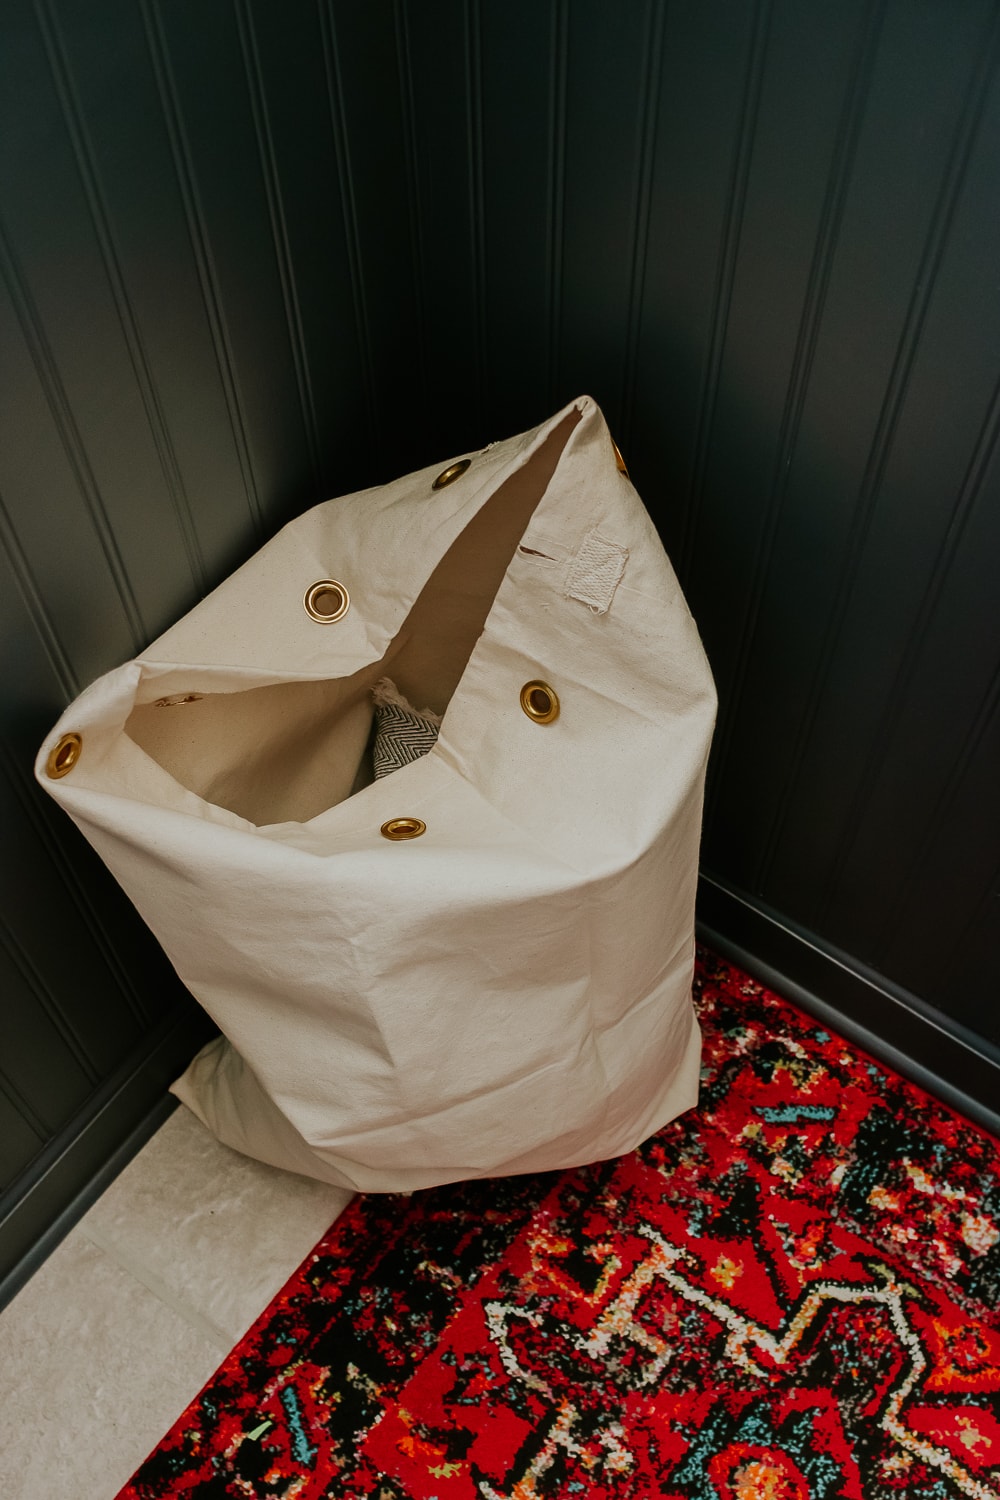
I was really inspired by this grommet laundry bag that I saw in Pottery Barn.

This version has larger grommets than what I found. But I decided to go for it anyways.
DIY Hanging Laundry Bag Version 1
Things You’ll Need
- Canvas Laundry Bag (I used this one)
- Grommet Kit
- Hammer
- Scissors

An easy, no-sew tutorial for a hanging laundry bag.
Total time: 20 minutes
-
Prepare Laundry Bag
To save precious time, I bought a cheap canvas laundry bag and cut the strap off, and also took out the cinch string. You can always make your own out of drop cloth or canvas, but that would require sewing. You can leave the strap and cinch string intact if you want. I also ironed my bag a little bit so it looked better (but you can tell that it’s still a bit wrinkly LOL).
-
Install Grommets

If you scroll down you can see the full photo guide for how to use a grommet kit and install grommets. Also, Youtube has a bunch of tutorials. I spaced my grommets every 4.5 inches or so.
-
Hang it up!

That’s it! You have a hanging laundry bag! And it’s so pretty! Now you can hang this on a nail (in a stud if you think it’s gonna be heavy), or from another hook. I am hanging mine off my peg rail – since the grommets were small, I’m using a couple of S hooks to help out.

Note about Installing Grommets
A few helpful notes here:
FIRST: Grommets come in all different sizes and finishes. I went with the most basic kit that was sold on Amazon (1/2 inch grommets) and it worked great. These grommets work best on thick fabric (two layers of fabric ideally). You can achieve this by creating a little folded hem and installing your grommets through both layers. Otherwise, your grommets will be loose. Not a big deal. But worth noting.
SECOND: I had a bit of trouble cutting out the holes in the canvas using the grommet cutter. So that’s where the scissors come in. I would use the grommet cutter first to create the circle outline, and then carefully cut it out using my scissors. It doesn’t matter how the hole is formed. You just need a hole the right size.


DIY Hanging Laundry Hamper Version 2
I had some extra fabric lying around from old projects. Actually, the fabric was from when I made zipper pouches (it was the inner liner) and another fabric was from when I shibori dyed some canvas. They totally work! I just used plain white canvas as the back piece of the hampers. I like the medium-weight fabrics because they give the hamper some structure, even though it just hangs on a couple of hooks.
Materials Needed
- Your choice of fabric (you really only need 1 yard to make 1 hamper, unless you want something bigger). I really like Premier Prints fabrics – they are on trend and inexpensive compared to other brands. They are also just a good quality fabric.
- Sewing Machine and thread
- Scissors
I ended up making one for my son too because he also has a basket-type hamper with NO liner. That’s an even bigger pain when I want to do his laundry!


I made two different versions of the hamper but they both work. Here’s the basic idea for his hamper (Hamper 1).
- Cut two pieces of fabric the same size as you want your hamper.
- Sew a double hem on the top two edges of each piece of fabric. This will be the part where it opens.
- Line up your two pieces of fabric with right sides facing each other.
- Sew around the three sides, keeping the top part open (where you sewed the hems).
- Finish by making a little loop out of fabric and sewing the bottom of the loop to the inner sides or back of the hamper.
- Now flip it right side out!
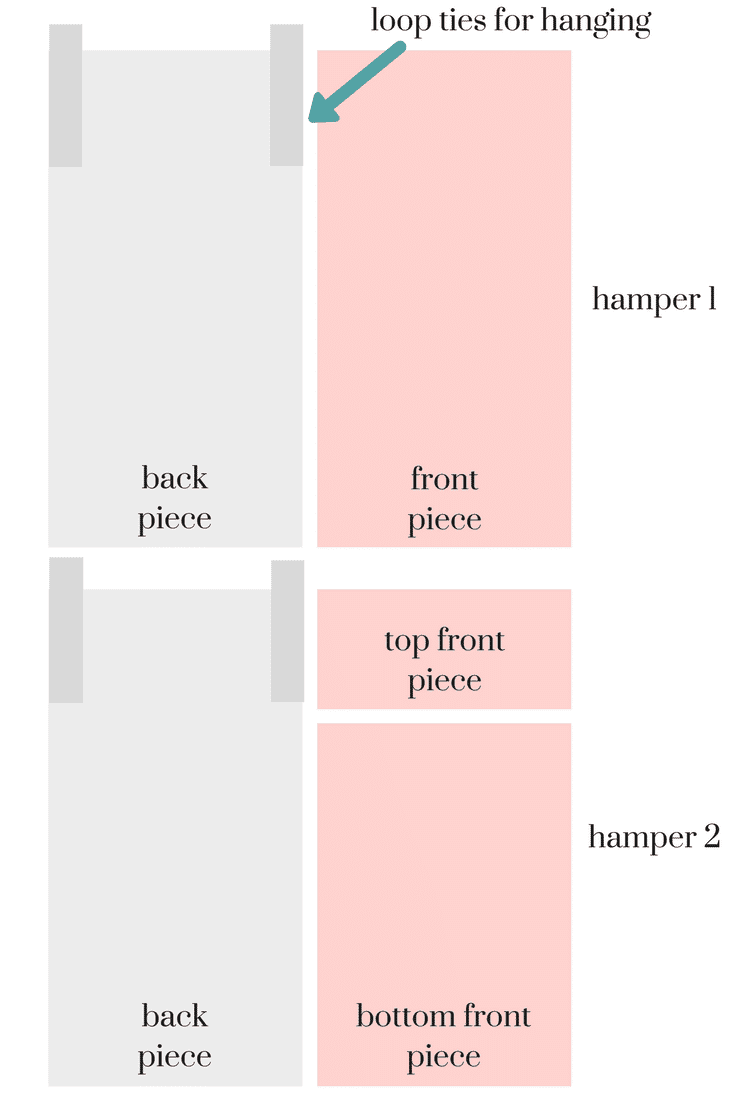
For Hannah’s hamper, I made hers bigger with an opening (“mouth”) in the front instead. Here’s how I did it. (Hamper 2).
- Cut two pieces of fabric the same size as you want your hamper.
- On the front piece of fabric, cut out a smaller piece as shown in the picture (this will be the top part of the hamper “mouth”.)
- You want to sew your double hem on the bottom of the smaller front piece and the top of the larger front piece (where the mouth is).
- Then, line up your front and back pieces again with right sides facing and sew ALL the way around. Repeat with the second front piece.
- Attach your loop ties.
- Flip it right side out.
I know I keep calling the opening a “mouth”, but I saw somewhere (maybe Pinterest??) where they called the hamper a hungry hamper and you have to “feed” it to your dirty clothes. She’s definitely been using it (so far) and I’m loving the extra space in her closet.

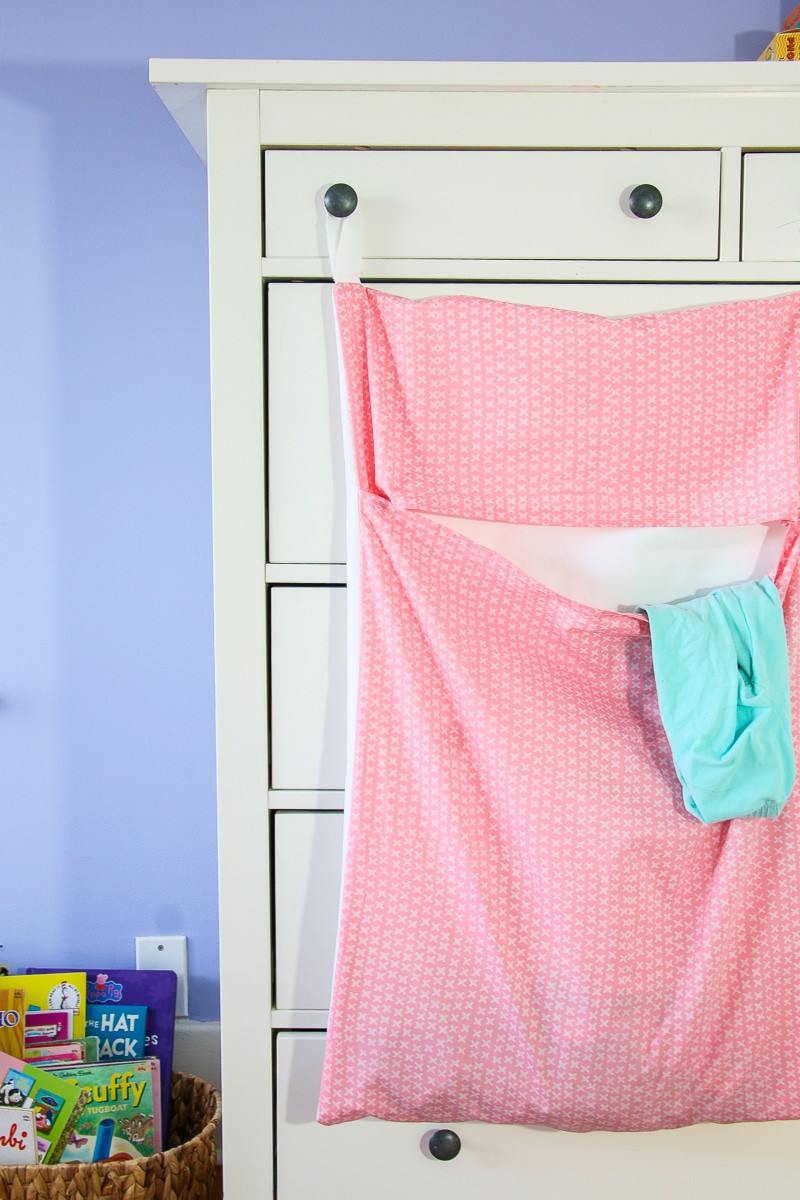
This also makes it so much easier to grab their laundry bags and do a load of laundry.
I’m actually thinking about making his and hers versions for our room too. I was surprised by how little time this took. And here’s another tip. I used washable fabrics so if the hampers get smelly, I can just wash them.
I hope you guys enjoyed this DIY hanging laundry bag tutorial and Thanks so much for visiting!
xo Karen

