Basic Macrame Knots + Printable Macrame Knots PDf

This post contains affiliate links, which means we may earn a small commission if you purchase through them — at no additional cost to you. Please see our policy page for more details.
Are you feeling totally overwhelmed by Macrame? Do you see all these beautiful patterns and think, ‘I could never do that?’ I have good news for you. YOU CAN! Learn how to make basic macrame knots with this step-by-step guide. Includes a handy macrame knots pdf at the bottom of the post that you can print out for your next macrame project!
A few of you have asked me about tying Spiral Knots. So I included a video at the bottom of this post with me tying spiral knot macrame ornaments. You can use the Quick Links section to jump right there.
Is Macrame Easy?
Macrame is basically tying knots, in my opinion. As with most things in life, you can improve on your craft with practice. I do think Macrame is an easy craft to pick up.
Although very intricate knots can take a bit of practice, these basic knots I’m about to show you are sometimes all you need. Because here’s the great thing about macrame: Even the most basic macrame knots can make drop-dead gorgeous patterns. Just check out these macrame projects for the beginner. Amazing, right?
If you can tie a knot, you can macrame.
Basic Macrame Knots: Step by Step
Below are four basic knots to get you started. You can make so many things with just these basic knots under your belt. Keychains, bookmarks, placemats, macrame bracelets, macrame knot wall hangings, plant and jar hangers, etc.
So first we need to go grab some Macrame cord. I like this cording. But Amazon has TONS of options for good macrame cording. And don’t forget that you can get all sorts of colors too. Read the reviews and find what works for you.
Then, we need to get a hoop, a stick or a ring. Something like this to attach your cord to. Let’s get started with our knots …
Lark’s Head Knot
The Lark’s Head Knot is one of the most basic knots in Macrame.
In fact, almost every beautiful piece of finished macrame you see starts with this knot.
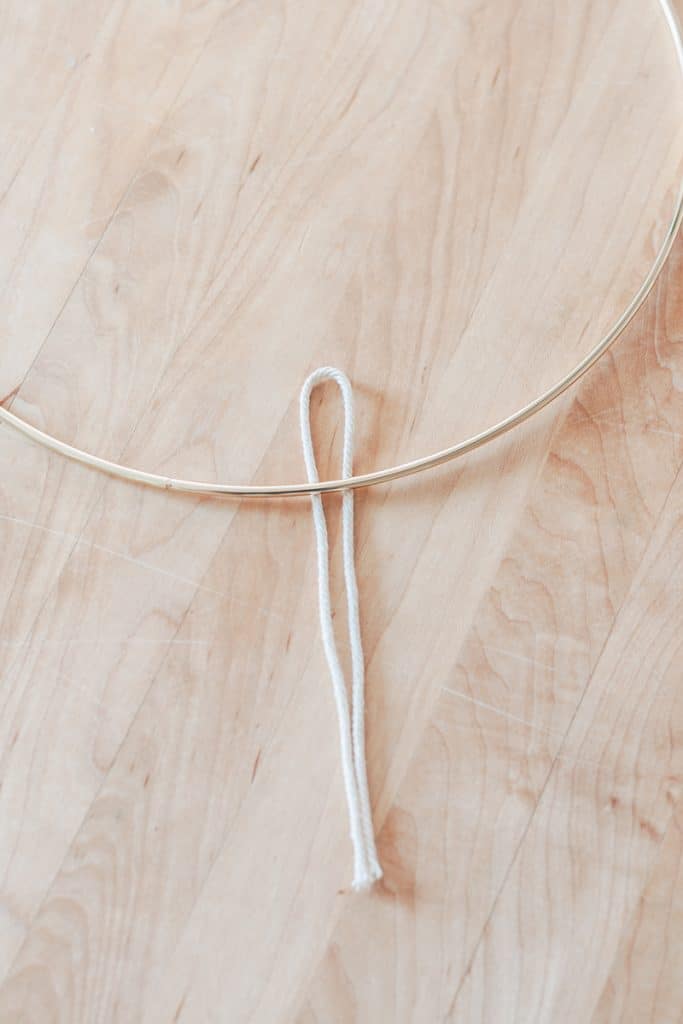

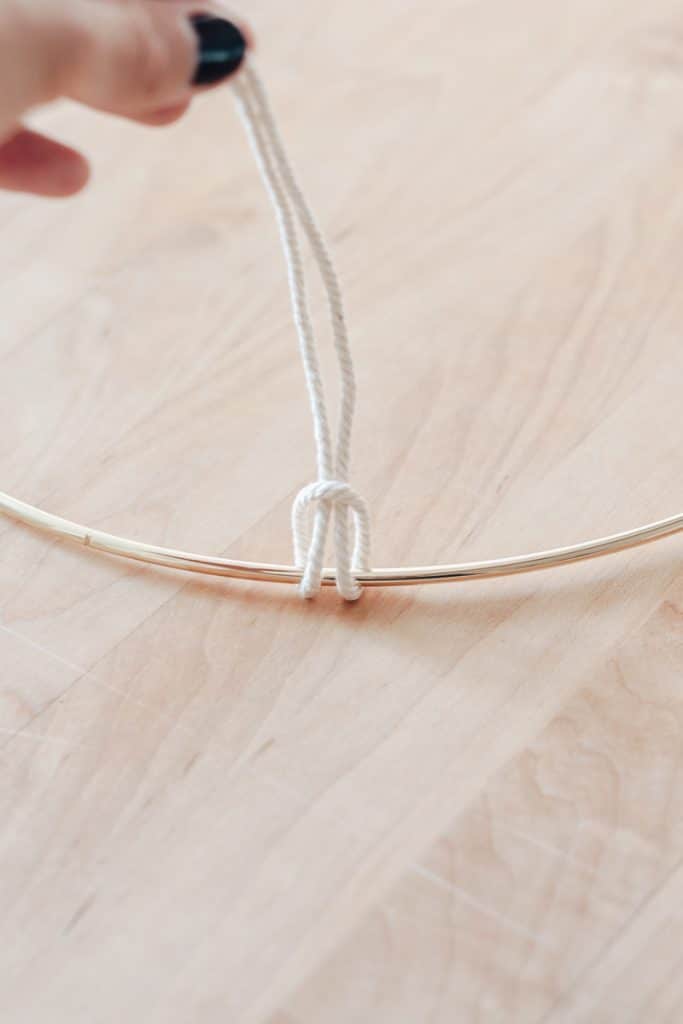

The Lark’s head knot is used to attach your cording to your ring, dowel or handle when starting a macrame project.
- Start by folding your piece of macrame cord in half.
- See that little loop? Place that loop under your ring or dowel.
- Now fish the ends of the cording through that loop.
- Pull tight and you have your lark’s head knot!
By the way – check out this really easy and cute DIY macrame knot wall hanging with beads using JUST the lark’s head knot.
To make a reverse lark’s head knot – you simply do a lark’s head knot the opposite way. OR – just flip your project around to the back.
Square Knot
There are essentially two parts to the square knot.
You have to complete one side (also called a half square knot) and then the other side (also called a right half square knot) to make the full square knot.

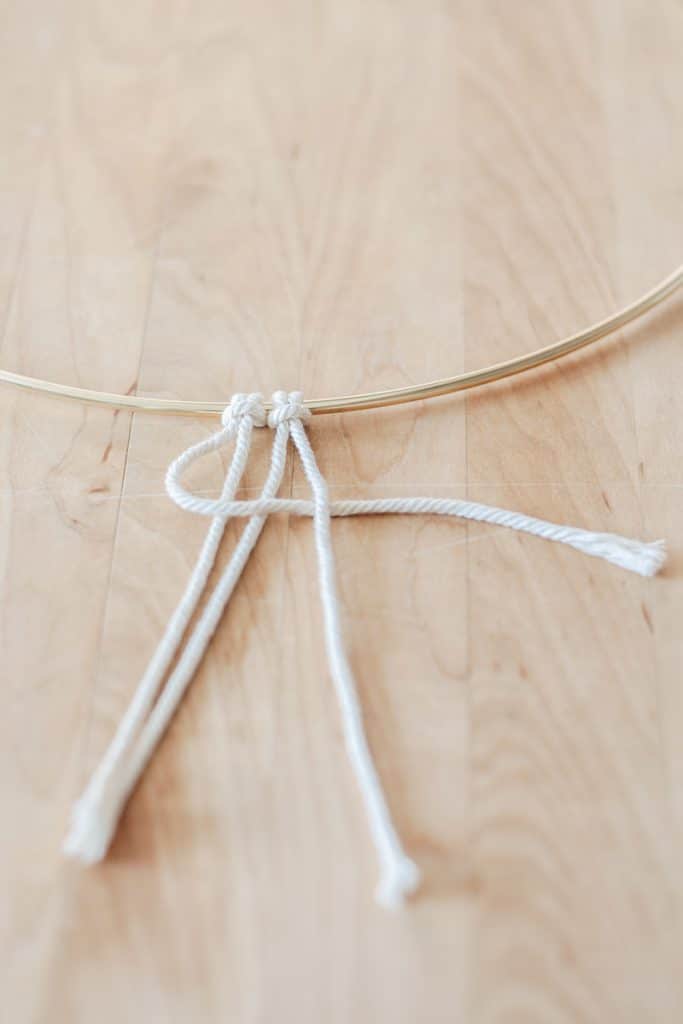

- Start with two Lark’s head Knots.
- There should be a total of 4 macrame cords there.
- We are going to take the outer left cord and cross it over the two middle cords.
- Now take the outer right cord and place it on top of the left cord and UNDER the two middle cords.
- Loop it through the hole on the left side.
- Now pull tight without letting your cords twist.
- Yay! You now have ONE side of your square knot done. You have now completed a half square knot.
Now, let’s do the other side…
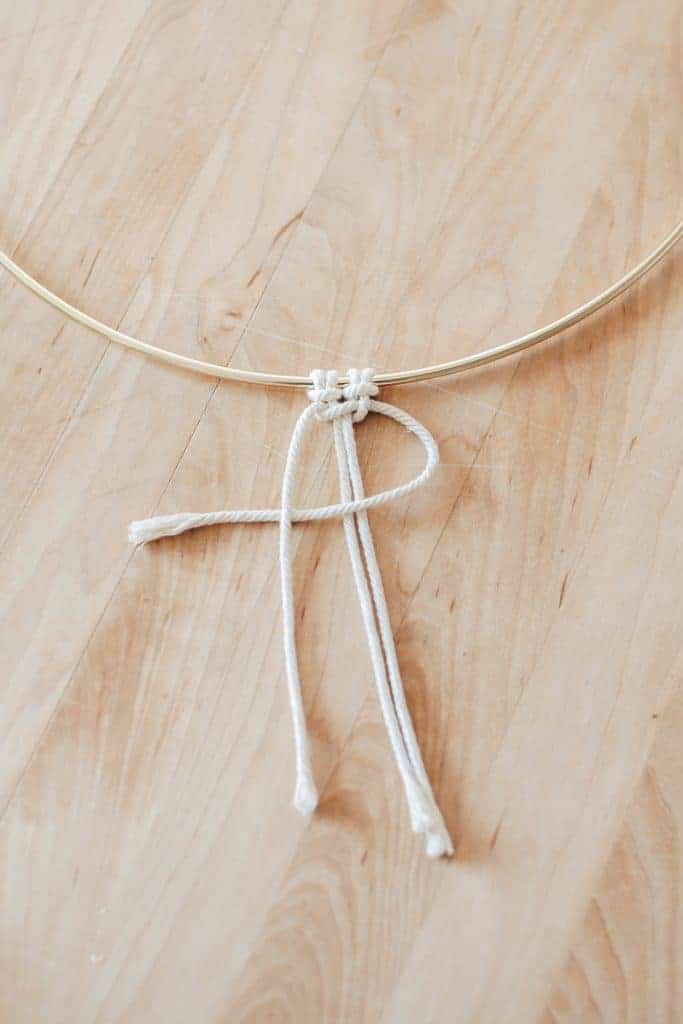
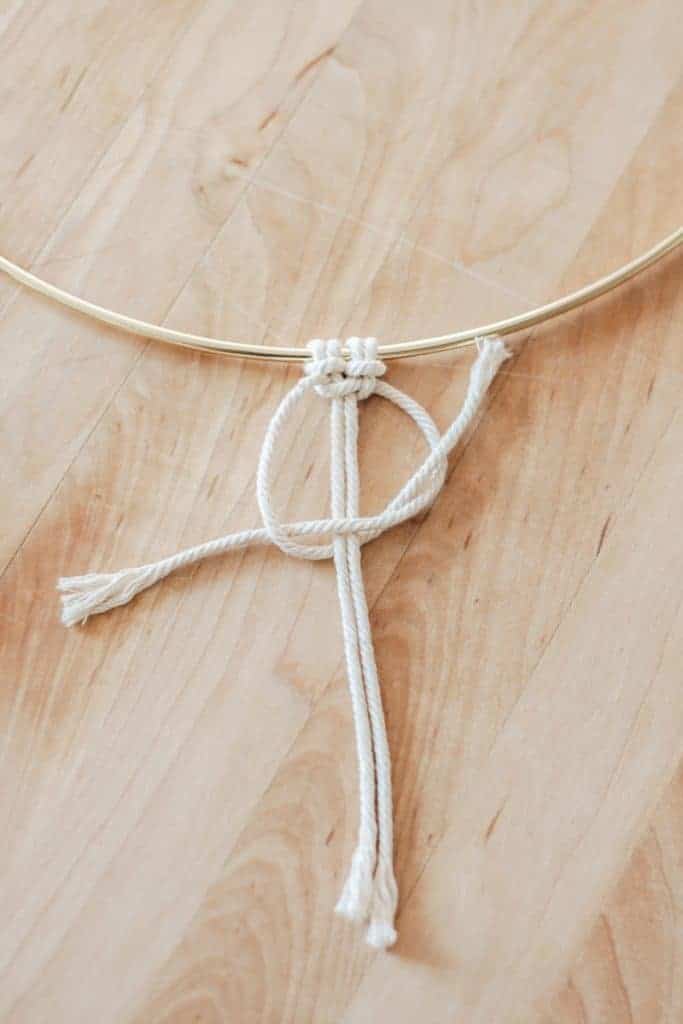
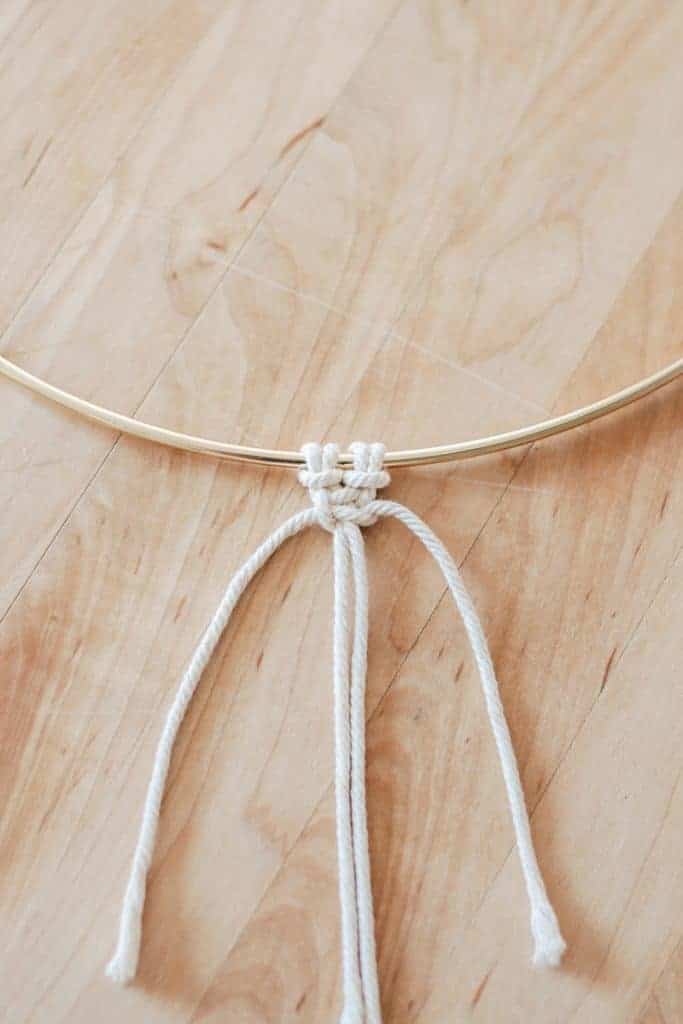
- You should still see your 4 cords there – got it? Good.
- Take the outer RIGHT cord and cross it over the two middle cords.
- Take the outer left cord and place it on top of the left cord and UNDER the two middle cords.
- Loop it through the hole on the right side.
- Now pull your cords tight. Your Right Half Square Knot is complete.
- You have completed the full square knot.
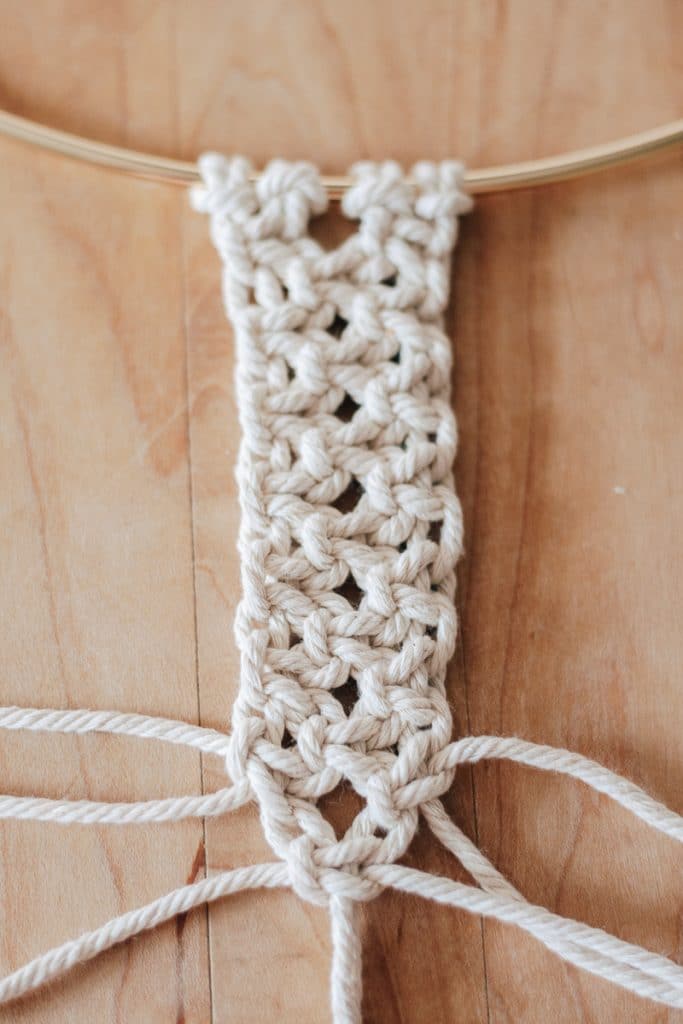
When you repeat this knot over and over again (in rows or sinnets) – you end up with a beautiful pattern of tightly weaved or netted cording.
This photo below is an alternating square knot.
This is more of a wider pattern. I love alternating square knots with even spacing in between the knots.


To make the alternating square knot as I did above, start with 4 Lark’s head knots (there will be 8 total cords).
- Make a square knot with four left side cords.
- Make a square knot with the four right side cords.
- Make a square knot with the four middle cords. (Push away the outer two cords on the left and right side to make it easier.)
- Continue working this pattern, left, right, middle, left, right, middle.
- Make sure to pull your cords tight without any twisting.
Half Hitch
To me, a half hitch is simply your basic knot. Follow these steps …
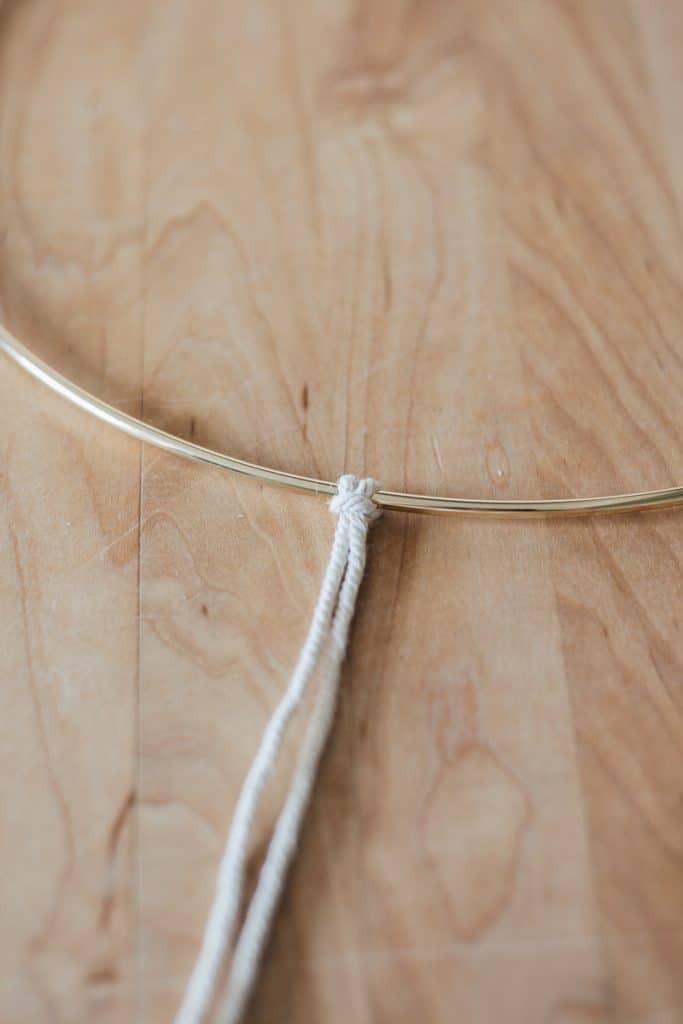


- Start with a Lark’s head knot.
- Take one cord and make a number 4.
- Loop that cord through the “4” hole and pull tight.
- You made a half hitch knot!
Double Half Hitch
A double half hitch knot is just a half hitch knot repeated a second time.
- Start with a Lark’s head knot.
- Take one cord and make a number 4.
- Loop that cord through the “4” hole and pull tight.
- Make another number 4 using the same cord you used before.
- Loop it through the hole of the “4” and pull tight.
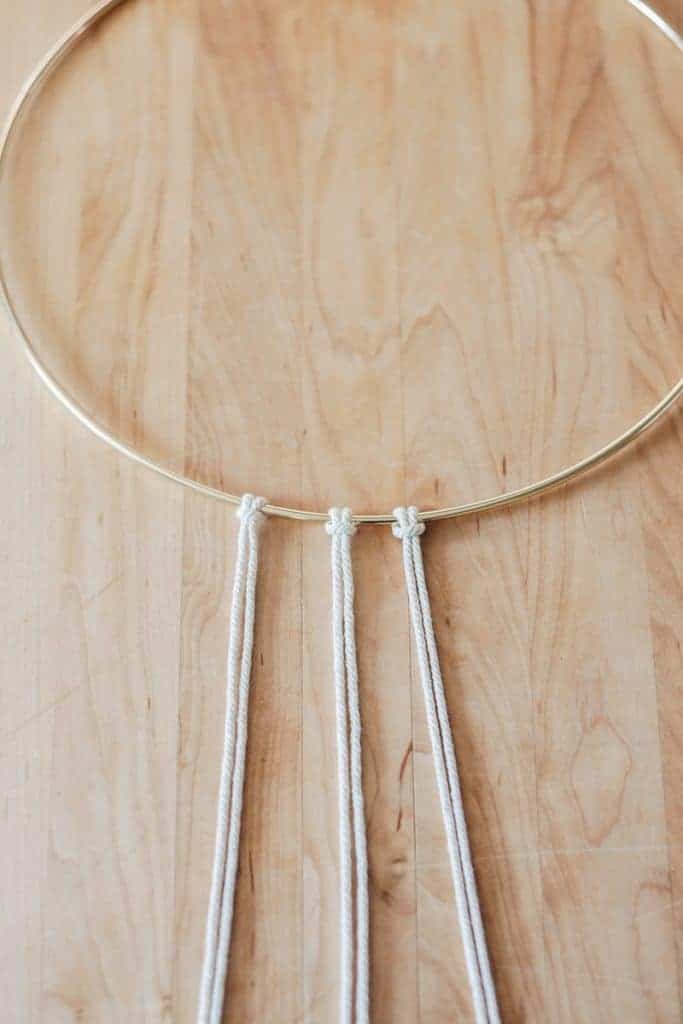
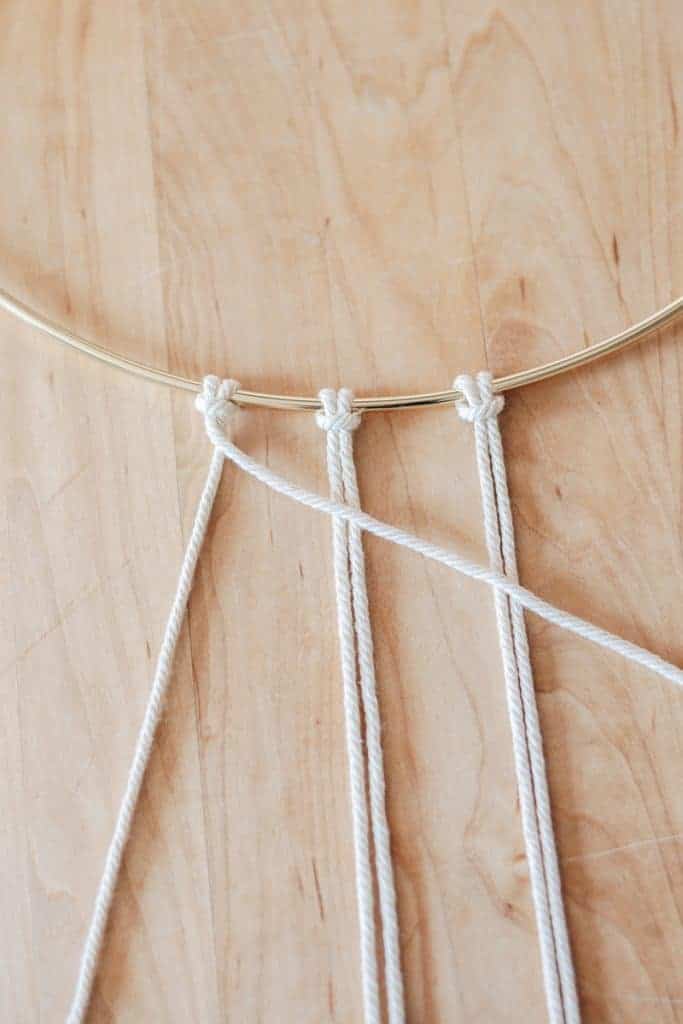
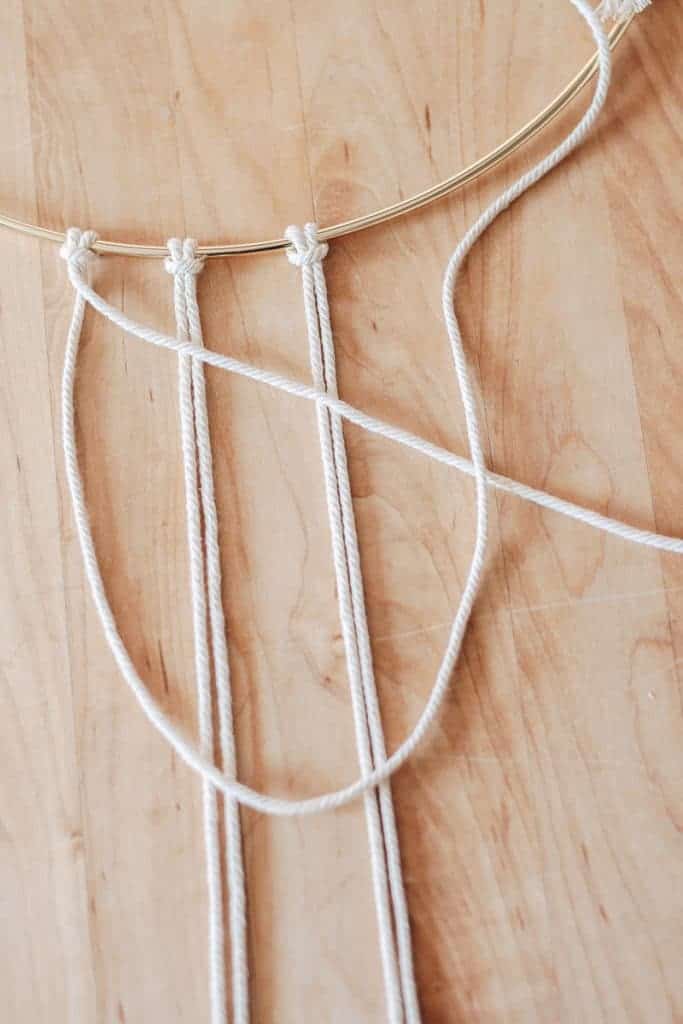

See that diagonal pattern I made? You can make this by doing a repeat of double half hitch knots. (See photo above)
Here’s how to make it:
- Start with 3 or more Lark’s head knots. For this example – we are using 3 Lark’s Head knots. There is a total of 6 cords.
- Take the outer left cord and place it diagonally across all the other 5 cords. This cord is your filler cord. The direction and placement of this outer left cord will determine the pattern. So just make sure it’s placed the way you want over your cords.
- Working left to right, make a double half hitch knot with the second cord.
- Pull your cord tight. Ensure your outer left cord is still placed diagonally over the cords.
- Now make a double half hitch knot with the third cord.
- Now make a double half hitch knot with the fourth cord.
- And keep going until you reach the last cord on the right side. You will see your diagonal pattern of knots.
- Now, you are going to repeat steps 2-7 but this time working right to left. So place the outer right cord diagonally over the other cords.


You can also make a horizontal line of double half hitch knots (just go horizontal instead of diagonal with that first cord).
There are variations to the half hitch knots, (like triple half hitch knots), but even with these basic half hitch knots, you can make great patterns.
How to Tie a Spiral Knot
I think the Spiral knot is one of the prettiest knots. And fortunately – it’s one of the easiest too!
You already know how to do the spiral knot.
It’s just a repeat pattern of half-square knots (first half of a square knot) or half hitch knots.
Instead of switching to the right side to complete the square knot, you just keep working that left side. The macrame will naturally spiral. Just go with it.
Watch a Video of Spiral Knot
I made spiral Christmas Ornaments. You can see how I did this below.
To make a thicker version of the spiral knot, start with 2 Lark’s Head knots.
To make a single version – start with 1 Lark’s Head knot and make a repeat pattern of half hitch knots.
Again – your macrame will naturally start to twist. This is the pattern on the far right below. The trickiest part of this knot is keeping the pattern going the right way when it starts to twist.
You Did It!
You’re awesome! Pat yourself on the back! Look at your beautiful macrame knots and patterns. Aren’t you super impressed?
Download your Guide
Please click the download button below to get your guide! It will automatically download to your computer. This is for personal use only, please do not share this or distribute.
xo Karen


