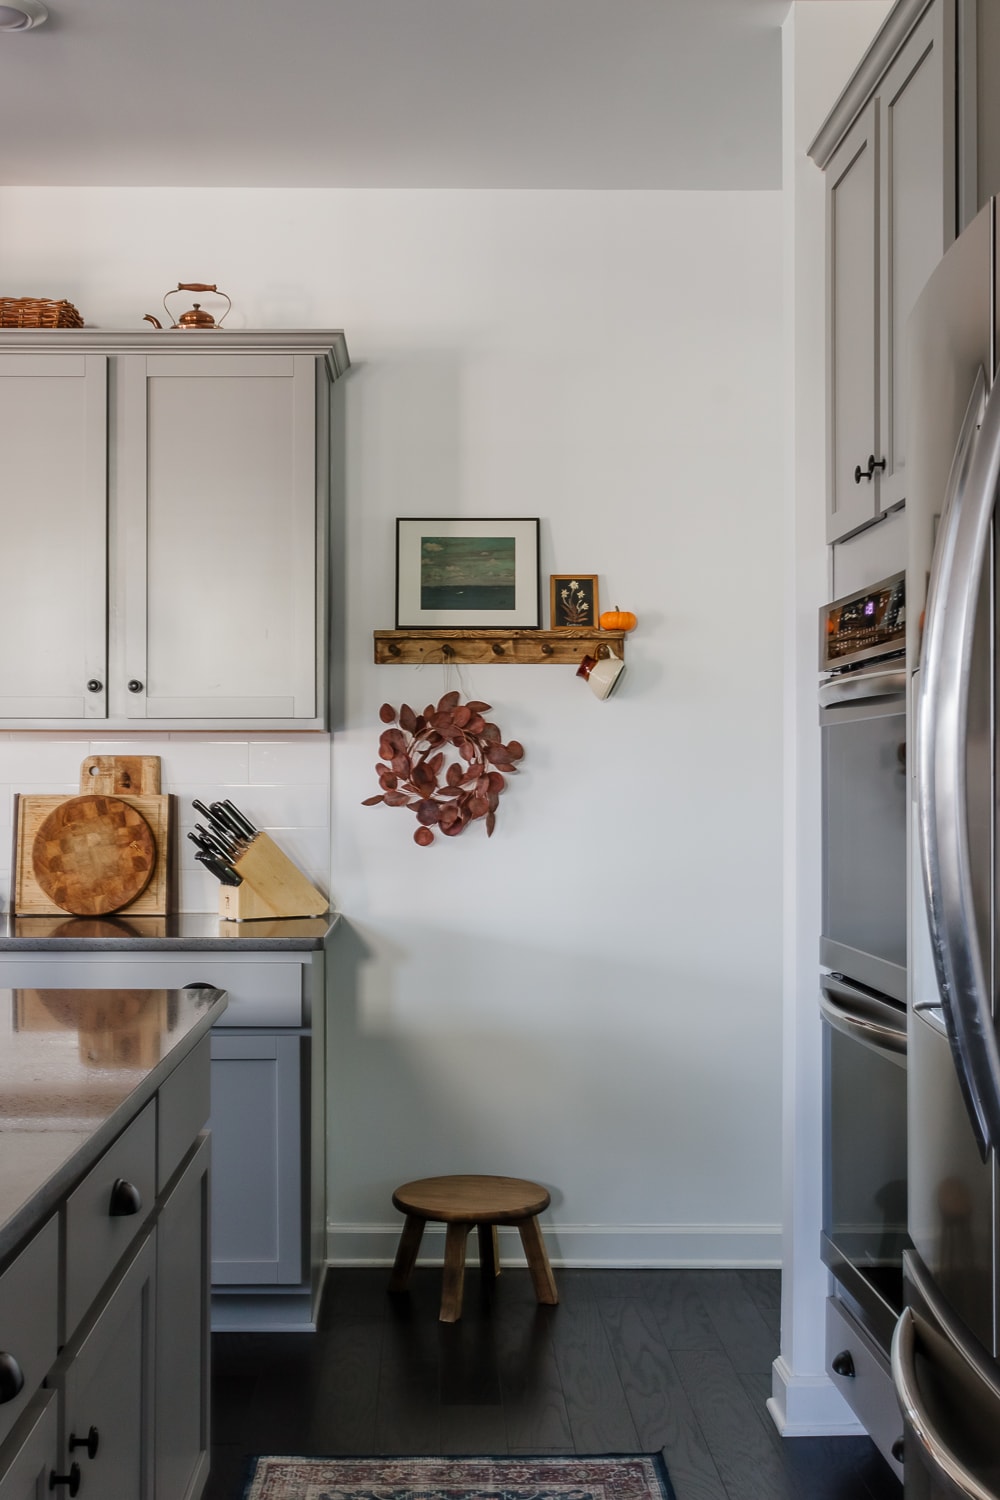
DIY Peg Rail: Two Ways to Build this Stylish Decor Piece!
This post contains affiliate links, which means we may earn a small commission if you purchase through them — at no additional cost to you. Please see our policy page for more details.
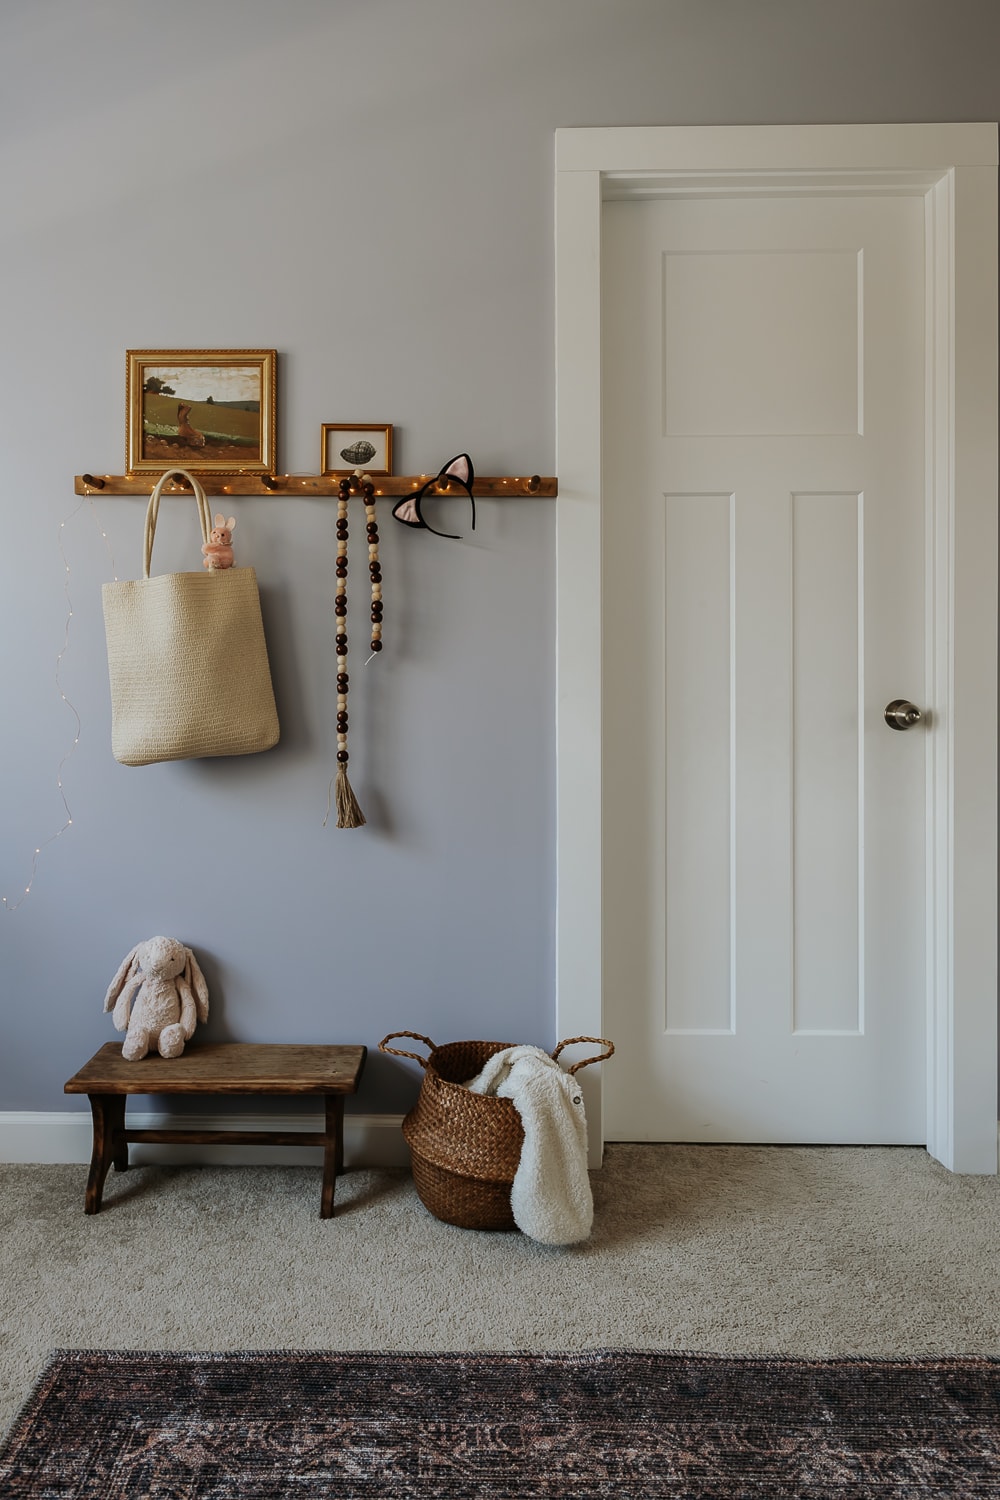
Are you tired of dealing with cluttered entryways or disorganized spaces in your home? It’s frustrating when coats, bags, and hats end up strewn across chairs or piled up on the floor, making your space feel chaotic and unwelcoming. Luckily, there’s a simple and stylish solution: this DIY peg rail.
In this post, I’ll guide you through the process of building your own peg rail, step by step. With just a few materials and a bit of DIY know-how, you can create a functional and attractive storage solution that will keep your entryway tidy and your belongings easily accessible. Let’s get started!
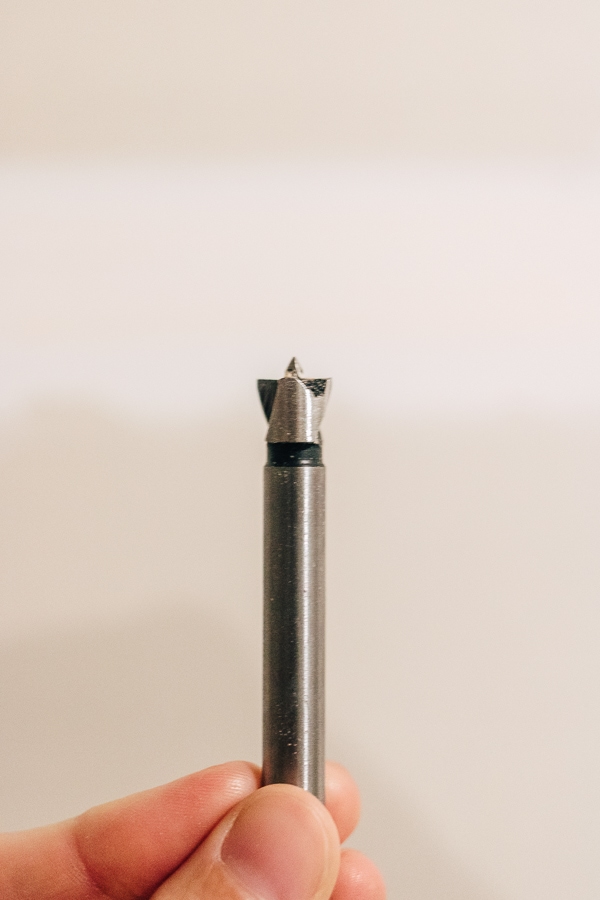
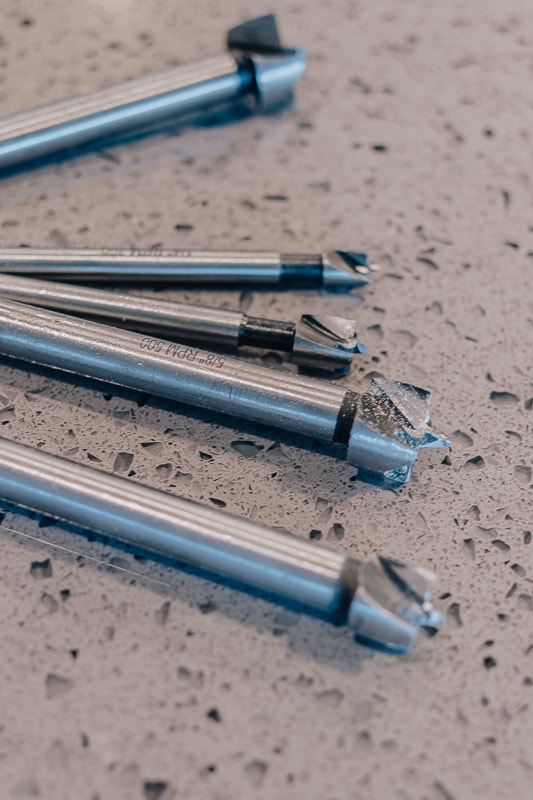
You want to make sure you get the right size drill bit for your size pegs – I just hold the peg and drill bit next to each other and eyeball the one that matches best.
Expert Tip: You’ll want to invest in a set of Forstner or Spade drill bits. You can use either as they do the same thing. These drill bits will make a hole in the wood for you to insert your pegs. These are not expensive drill bits and can be picked up at most hardware stores as well as online (such as Amazon). I use a Forstner drill bit because I find it easier to control the depth.
Things You’ll Need
- Wood Board – I used a cheap Pine furring strip (1x3x8). I prefer a thinner look to a shaker peg rail. Make sure the wood is deep enough to hold your peg tenon without poking out the back. (the tenon is the part of the peg that goes into the wood)
- Wood Pegs or Screw-in Pegs
- Wood Glue
- Polyurethane
- Forstner Drill Bit or Spade Drill Bit
- Drill
- Sandpaper or Orbital Sander
- Stain or Spray Paint ( I used Varathane Early American)
- Pencil to mark off a centerline and measure where each peg will go
- Tape Measure – see (How to Read a Tape Measure)
- Combination Square
- Rubber Mallet
How to Make a Peg Rail Step by Step
Step 1 – Measure your Board and Mark Off Peg Placement
Make sure your pine board is cut to the length you want first. You can do this at home with a miter saw or have the hardware store cut it for you.
First, measure the length of your board and determine how you want your pegs spaced. Then, use a combination square to find the exact center of your board for the peg placement and draw a line across your board. You can do this by measuring the total width of the board, then splitting the number in half to find the center.

From there, measure the spacing distance for each peg and place a mark. I started the board with two inches on either side, then each peg spaced 8 inches apart. My shaker peg rail is 44 inches long.
Step 2 – Drill your Peg Holes
For the traditional wood pegs: Take your Forstner or Spade Drill Bit and drill a hole on each peg mark. You may have to stop once and clean the sawdust out before proceeding. Try to drill as straight down as possible so your pegs go in nice and straight.

For the screw-in pegs: Drill a small pilot hole on each one of your peg marks. This will make it easier to screw in your pegs. It’s not necessary, but the pegs can be a little difficult to screw in by hand.
Step 3 – Install Pegs
For the traditional wood pegs: Put a dab of wood glue along the sides of each hole – you may want to do this part from the backside. Wipe away any excess glue. If your wood glue dries on the top, these areas won’t accept your stain later on.
TO MAKE YOUR OWN PEGS: Buy a 3/4 inch wood dowel (sold at hardware stores) and cut 3 inch pegs from it using a table saw. Then, you just have to attach them with wood glue the same way you would traditional wood pegs. You can use a sander to round the tops a bit.


Quickly insert your wood pegs in the holes, and use a rubber mallet to carefully pound them in until they are flush with the board.
For the screw-in pegs: You’ll do just that – screw in your pegs. These get more difficult to screw in as you go along. You can use pliers and gently try to screw them in that way to give you a bit more leverage. Just giving you a little heads up that it takes some serious hand strength toward the end – but still totally doable. You can do itMake sure each peg is screwed in nice and tight and that they are flush with the board.
Step 4 – Sand, then Stain, or Paint
Sand your shaker peg rail so it’s nice and smooth. I used my orbital sander because I love to round the edges of the wood board (gives it more of a rustic look.) Similar to what I did on my DIY wood bench.
After sanding, remove any sawdust with a tack cloth.

Now it’s time to spray paint or stain! I chose Early American Stain for the new peg rail and Rustoleum Matte Black for the older peg rail.
I don’t know about you but I personally love the look of stained pine wood. It brings out all those beautiful grains in the wood. I get that Pine is not the strongest wood, and it can be yellow, but to me it looks just as pretty.
Follow with a quick coat of polyurethane for protection.

Rustoleum makes the best spray paint ever in my opinion. Spray light coats outdoors or in a well-ventilated area, and wear a mask and rubber gloves.
I also recommend spray painting your peg rail in an old cardboard box to avoid discolored grass. (I once had pink grass for weeks.) Allow the paint or stain to dry for 24 hrs.
Step 5 – Hang and Enjoy
You’re finished! Now you just need to hang it.
I recommend screwing this into a stud in your wall on each end of the peg rail. You can place the screws in between the pegs, then if you want, use a wood button or screw hole sticker to hide it. Make sure it’s nice and sturdy on your wall before hanging anything heavy from it.


How To Make A Shaker Peg Rail With Shelf
A step-by-step tutorial for creating a shaker peg rail with a shelf. This tutorial is basically the same – only we are adding a shelf on top! You can attach the shelf using a combination of wood glue and brad nails.
Total time: 1 day
- Cut Wood To Length Of Rail
 You’ll want two equal pieces of wood. My wood rail is exactly 25 inches long, so I cut two pieces of wood from the 1×3 that measure 25 inches.
 - Measure And Mark Peg Placement
 You need to mark your peg placement so you know where to drill the holes. I had the two end pegs 2 inches from the end of the board, then I spaced the other three pegs 5.25 inches apart. You will also need to find the center of the board, which is exactly 1.25 inches on a 1×3. Mark this spot with a pencil. You will want to use a special drill bit to make these holes.
 - Drill Holes For Pegs
 Using your drill with a 1/2 inch countersink, Forstner, or spade drill bit – drill holes for your pegs using the peg placement marks you made in the previous step. Test each peg to ensure a tight fit.
 - Sand WoodI used an orbital sander for this but you can also use regular sandpaper. Sand all the rough edges for your wood pieces. You can also round some of the edges to take away that raw lumber look.
- Attach Pegs To Rail
 Place a spot of wood glue in each peg hole, and then place a small amount of wood glue around each peg tenon before inserting it into each hole. A little bit goes a long way and prevents glue from seeping out of the holes (and potentially preventing wood stain to adhere later on.)
 - Attach Top Shelf To Rail
 Place a line of wood glue on the top of your peg rail and attach your top-shelf piece to your peg rail. Use wood glue to firmly hold this in place for 24 hours. Tip: Ensure that you are not clamping your peg shelf so hard that it bends it forward. You still want the shelf to be level and straight.
 - Optional – Follow With Brad Nails: If you want an extra-strong peg rack – you can pop a few brad nails where the top shelf and peg rail meet. This is an optional step.
- Stain And Protect Your Shaker Peg Rail: After the wood glue has cured (24 hrs), apply your favorite wood stain to your shaker peg rack. I’m using one of my favorites – Early American. You want to follow with a coat of polyurethane for protection. You can also just cover your peg rack with polyurethane if you prefer a natural look. Allow your peg rack to dry completely.
- Hang On Wall
 You’ll want to drill your new shaker peg rail into the studs, if possible. Use a stud finder to mark the placement of the studs on the wall and then on the peg rail. Pre-drill holes in your peg rail at these stud marks while holding it to the wall. This will also mark the holes in the wall. Then, use 2-inch screws and drill through the holes into the wall.
Note About Wood Glue
Wood Glue, also called carpenter glue, is a type of PVA glue that binds to the fibers of the wood and cures stronger than the wood itself. It’s imperative that you follow the directions on your particular brand of wood glue for drying/curing times. Most unstressed joints will be fine after clamping for 30 minutes to an hour. However, for the strongest joints, you want to clamp and let it cure for at least 24 hours.
It’s also important to note that wood glue doesn’t like stain – so be sure to stain your wood after gluing or cover the parts that need wood gluing with masking tape. Remove wood glue before it dries on areas that you want to stain later.
Note About Screw Length
Since we are using a thinner piece of wood – 1×3 – for this project, the 2-inch screws were ample enough for attaching to the wall. If you decide to make a peg rack that is thicker, you will need thicker screws for hanging securely to the wall.
And that’s it for this fun shaker peg rail with shelf!
