How to Use a Paint Edger Like a Pro
This post contains affiliate links, which means we may earn a small commission if you purchase through them — at no additional cost to you. Please see our policy page for more details.
Our Playroom One Room Challenge has just begun!
That means that for the past two days I’ve been covered in paint, unshowered and hungry. Really hungry.
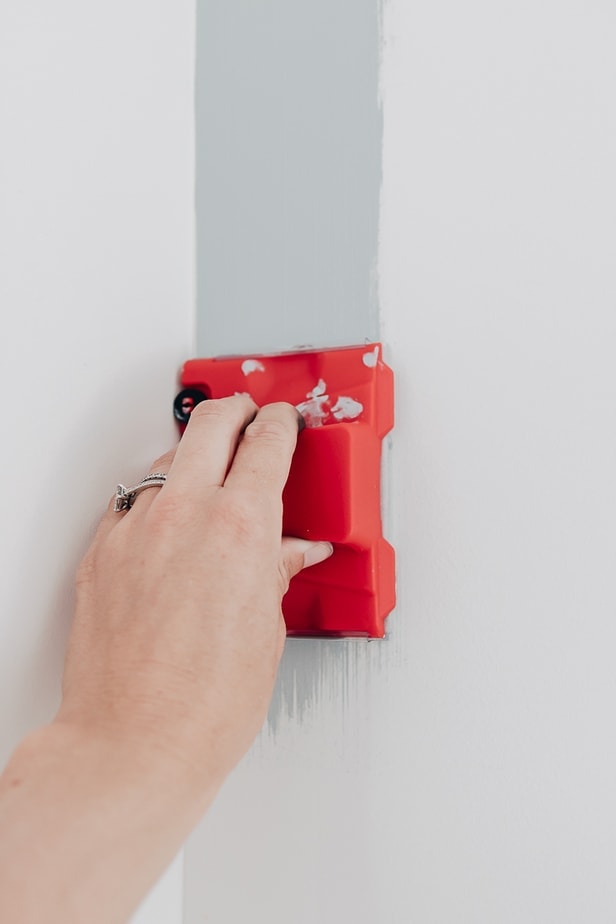
Today, I thought it would be helpful to show you guys how to use a paint edger. When you are trying to paint a room neatly and quickly – this thing is a godsend.
Our playroom is fairly large with two big windows on two walls. This means that I would have been taping these window casings and the baseboards for days – that is – if I wasn’t using my Shur-Line Paint Edger!
Please tell me I’m not the only one who is a lazy painter and hates to tape things off.
With a paint edger, as long as you follow the tips I’m about to give you – you can throw that blue tape right in the garbage.
(Actually please don’t, because that would be wasteful and it can be used for other things.)
Here’s a little rundown on Paint Edgers for you.
What’s a Paint Edger?
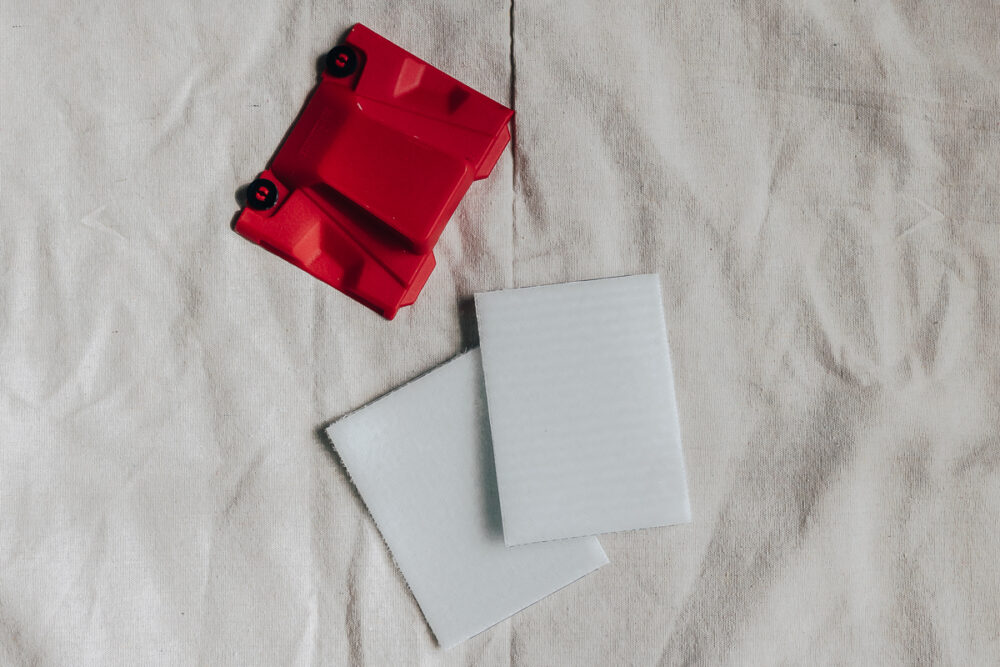
A paint edger is a little tool that helps you paint around trimwork, casings, baseboards and ceilings. It is a square tool, with wheels on one side and a gripper on the back for holding. You take a paint pad and attach to the paint edger and then paint with it.
Have you ever heard the painting term cutting in?
Cutting in refers to painting areas too tight or awkward for a paint roller – areas such as around casings and baseboards and ceilings! Instead of using your paintbrush and steady hand to cut in, you use this edger tool instead.
I don’t know about you but I can only concentrate for so long. My brain gets tired.
You can pretty much find paint edgers in most hardware and paint stores and online, (hi, Amazon).
A lot of companies make them but my favorite is Shur-Line. I’m still using the old one but now Shur-Line has improved PRO paint edgers with LED lights, flip-up wheels, and more sophisticated paint pads. Yea, they’re pretty tricked out nowadays.
Paint Edgers are a really quick way to get a nice, clean edge when painting your rooms (and you can skip all that prep tape work!)
How Does a Paint Edger Work?
It’s very easy!
The paint pad holds the paint. The edger with the wheels glides along with the trim (or ceiling or baseboard).
It’s almost like you’re driving around a little matchbox car. Can you tell I have a 5 yr old boy?

There are a few tricks to using one which is why I thought this post would be helpful. While I started painting our playroom for the One Room Challenge, I quickly grabbed my camera so I could take a few photos for you.
Let’s gather up what we need and then let’s get to the tips!
Things You’ll Need
- Paint Edger – I love the Shur-Line Paint Edger
- Paint Edger Paint Pads
- Paint Tray
- Paint (obviously)
- Damp paper towel or cloth (at the ready for mistakes)
How to Use a Paint Edger
1. Place a Clean Paint Pad on the Edger
Here’s something helpful to know (because I made this mistake at first!)
Shur-Line Paint pads are made to work with Shur-Line Paint Edgers. You can’t go to Sherwin Williams and pick up a replacement paint pad there because those are meant to work on Sherwin Williams paint edgers.
Just make sure you have the right one for the particular edger you are using.
The paint pads kind of “click” into place on the edger. There are two slots on the sides where the paint pad clicks in.
You want to make sure you have the paint pad lined up correctly on the edger – if you see a space then you installed it upside down.

The pad should cover the entirety of the paint edger.
2. Load Up Paint Pad with Paint
Take some of your paint and pour a bit in your paint tray.
Lay your paint pad on top of the paint tray, and then roll off some of the excess paint on the roller part of the tray. You want the entire pad covered with paint but not DRIPPING.
You also want to check that the wheels and wheel edge are completely clear of paint.
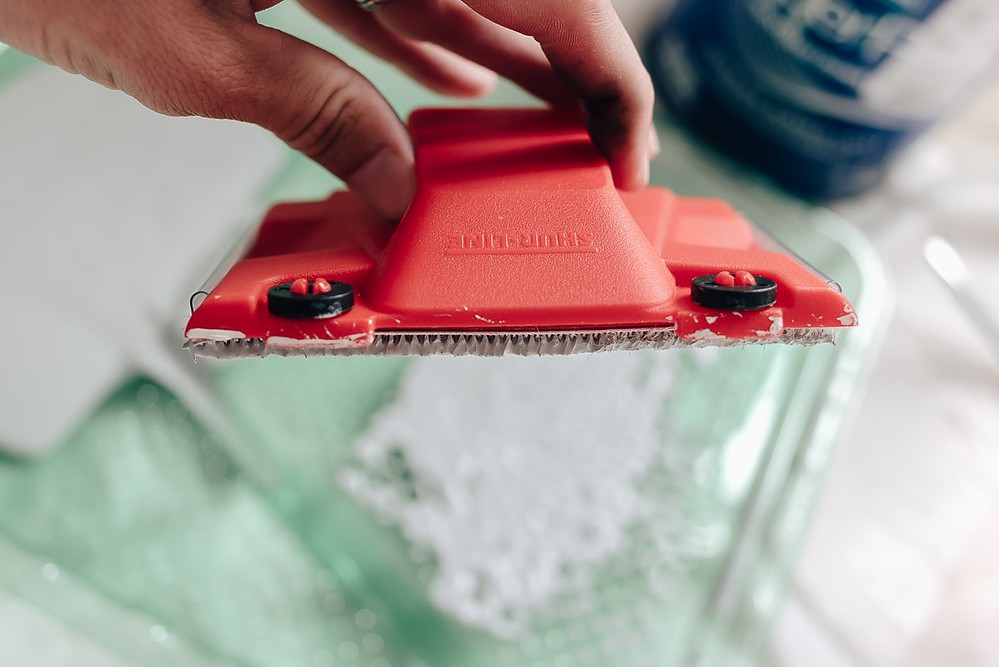
If you happen to get any paint on the wheels part, just take a damp paper towel or cloth and wipe it away.
3. Start Rolling Your Paint Edger
We are ready to go!
Line up your paint edger with the edge of the casing or ceiling. The wheels should be facing the molding or ceiling part. Apply a bit of pressure and start rolling the edger up and down as you make your way around the trim.

If you apply too much pressure – you will have a noticeable line where you stopped and started. So just keep things moving and rolling as smoothly as you can.
You can always take your paint roller afterward and blur the line. Reload your paint edger as needed.
There is a bit of a learning curve with a paint edger but I promise that you will pick it up after doing it a little while. Mistakes might happen, but it’s all good.
Tips for Using a Paint Edger on Baseboards
I found that using a paint edger on our baseboards was a bit awkward. Our baseboards are thin at the top – so there wasn’t enough of a “ledge” for the paint edger to roll on. If you have thick baseboards – this probably won’t be an issue.
Here’s the workaround I found for this.
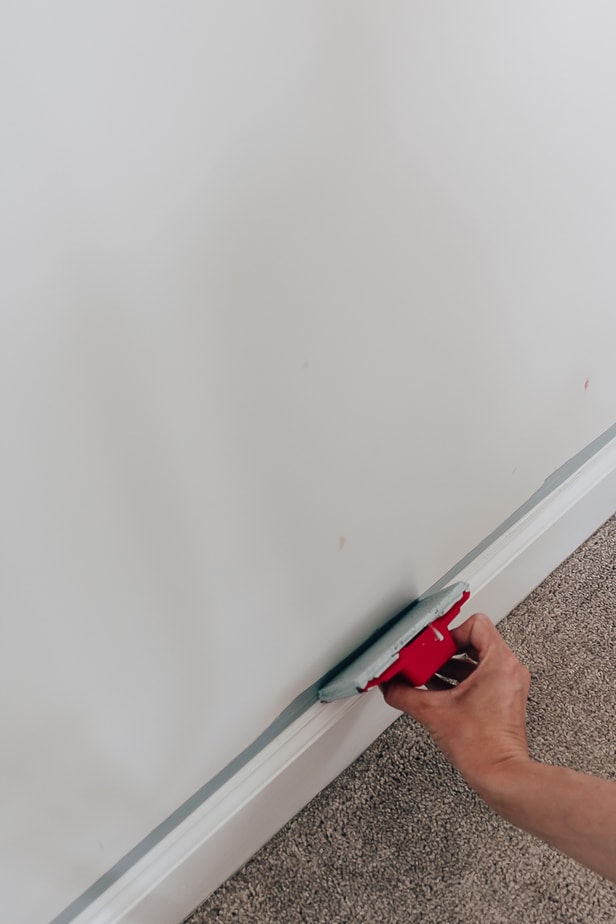
If you hold the paint edger at a slight angle along the baseboard, the wheels will glide better and you’ll avoid getting paint on the baseboard top. It leaves a nice, crisp paint line.
I also found that if your paint pad “missed” some spots – meaning, the paint was too light, you can run over it quickly with a paintbrush and fill in these areas. Trust me, it’s still much quicker than taping everything off and “cutting in”.
If you do end up getting a little paint on the baseboard, you can take your damp paper towel and wipe it clean.
That’s it! You can have a whole room edged out in under an hour which is saves you soooo much time!
If you are a sloppy painter (like me), or a lazy painter (like me), or just hate painting (like me) – then you need to try one of these paint edgers.

I’m so excited to show you guys this room! Be sure to tune in to Week 2 of the ORC so you can see how it turned out.
I’ll give you a little sneak peek…

I hope this helps! Talk soon!
xo Karen

